Share your craft projects
Make new craft buddies
Ask craft questions
Blog your craft journey
Blog Series
Card Scraper Sharpening
Part 1: How I Do It
There are so many ways to sharpen a card scraper but it doesn't have to be "Rocket Science" like so many people make it. Here's how I do it.
[ima...
How to Make Inlaid Dovetails (Double Dovetails)
Part 3: CUTTING THE TAILS
The critical step for inlaid dovetails is cutting a rabbet 1st on the tails board ( inside face ). For inlays it is mandatory. The depth of the ra...
Part 4: CUTTING THE CEDAR INLAY
First I marked up the pins positions using the tails per Fig 13. Next I set my marking gauge to account for the rebate on the tails board in Fig 1...
Home improvement
Part 1: Sagging gate repair
Our front gate, which is now 4 years old, started sagging enough recently that it wouldn’t latch any more. I was a little disappointed by the compa...
Art Deco Jewelry Cabinet
Part 1: Marquetry & Inlays
Here are a few pictures of the marquetry and routing in the inlays. By only using two veneers for the marquetry, Gaboon Ebony & Holly with the back...
Laser Veneer Parquetry Panel, start to finish
Part 1: Fun and Easy!
I've done a previous blog on a similar item, but this time I'm including the design process for those of you who are interested.
Making another pa...
Mobile Sewing Thread Storage Rack
Part 9: Building the Triangular Support Brace
[02.07 Design - Cart Details.jpg]
The support brace is a large open triangle that connects the cart’s base and rear panel. The top of the brace ...
Part 10: Finishing and Final Assembly
[12.13 - Finish and Assembly - Finished Rack.jpg]
With the brace finished, the rack was almost ready to assemble. I started by adding the top cap...
Part 11: Stabilizing the Rack, and Making Some Final Tweaks
[13.03 Fixes - Base Weight Rebar in Base.jpg]
When I brought the assembled rack inside, I was pleased to see that it was quite stable when the...
How I Sharpen
Part 4: V Tool - Part 2
I intended to do this all in one entry but I ran into a bit of a dilemma. The tool I'm working with is an Ashley Iles 60 degree, 1/2" inch tool wi...
Part 5: A Hook Knife for Spoon Carving
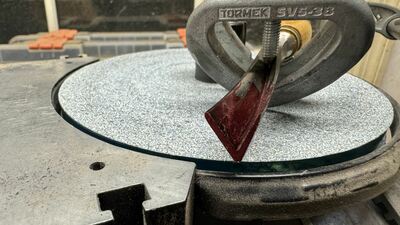
This one isn't exactly on sharpening but it does have to do with using abrasives on a tool blade so I thought I'd throw it in here. This is a copy...
Part 6: Knives with Power Sharpener
Haven't had a chance to get back to carving tools but I had a couple pocket knives that needed a refresh this weekend so I thought it would be wort...
Shop Dust Collection
Part 1: PVC Dust Collection System for a Supercell
Rather than drag the 4" hose around from machine to machine for my Oneida Supercell I decided to install a 4" PVC dust collection system. The 4" h...
Making Another Shop
Part 1: Better Late Than Never to Start a Blog
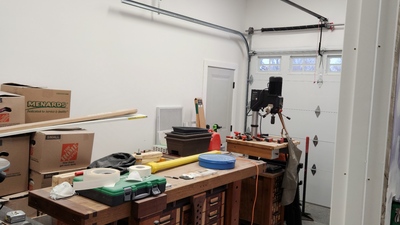
I've been AWOL for almost a year. Like a lot of other folks, I migrated over here from the other wood working forum a year or so back. About the...
Part 2: Finish Details
I'm going to start off by admitting I'm guilty of procrastinating on getting this posted. I kept telling thinking of one more thing that I wanted ...


