Share your craft projects
Make new craft buddies
Ask craft questions
Blog your craft journey
Blog Series
Restorations
Part 8: Edlund Commercial 5-lb Premier Scale
Found this at Urban Ore for $5 — I bought it because I needed a scale to weigh various wood working projects. For no other reason than to be able t...
Part 9: Millers Falls No 98 T-bevel gauge
Purchased from eBay for $35.71 (broken down as $26.99 + tax & shipping), a 1950’s sliding bevel gauge (T-bevel) made by Millers Falls, tool No 98.
...
Part 10: Eye carving riffler
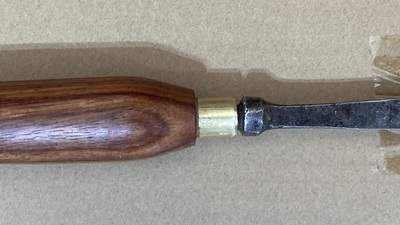
I have decided that this stone carving riffler is for carving eyes. The two ends combined, one effectively cuts the upper eyelid shape and the othe...
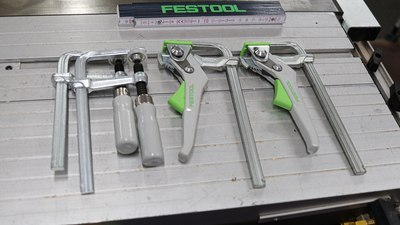
A collection of Clamps.
Part 27: Dovetail Clamps.
[IMG_0720.png]
Boy and Girls,
I primarily use these type of clamps with my tracksaw, however, before yazall mutiny and accuse me of Fe$too...
Part 28: Stanley quick Clamp/Vise.
[Untitled-1.png]
Boy and Girls,
I’m quickly running out of clamps (that I own), however, while many may refer to this as a vise, I often ...
Part 29: Rockler Auto-Lock T-Track Clamp.
[IMG_2099.png]
Boy and Girls,
(Consider this as a 2* review.)
When I posted my Auto Adjust Clamps, I deliberately avoided mentioning this pa...
Making Dowels
Part 6: Router Method
There are two ways of making dowel on the router. Using a fence and round over bit or a jig /die setup similar to the Table Saw method.
USING A ...
Part 7: My Current Method
My current method is using my Dowel Maker . Please follow this link and feel free to make comments.
Stock is cut just slightly larger than what y...
Part 8: Conclusion - Which is the best IMO
Here are the methods of making dowel
1. Drill and push through steel flat bar
2. Hammering through a holed plate
3. The Chisel Method
4. able saw ...
Vises
Part 6: Hi Vise - Body
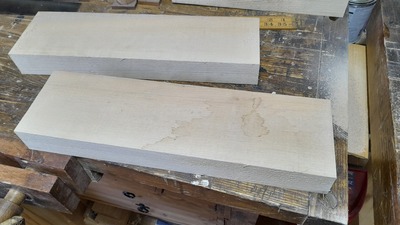
I'm making the body out of an ash 2x4.
so cut to size and square up.
[20230915_162313.jpg]
[20230915_163836.jpg]
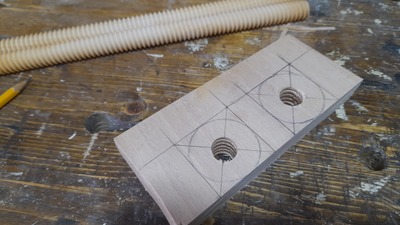
Drill and tap the main hole
[20230...
Part 7: Hi Vise - Finish
Make the handles for the fixing screws.
[20231001_160522.jpg]
[20231001_161419.jpg]
Just rasp into shape and add a bit of walnut to the end to hi...
Part 8: Mini Hi-Vise version 2
Well, the mini vice mount Hi-Vice gets pretty much constant use, so it’s time to make a nicer one based on the prototype.
Pretty happy with the ...
Handy Tools
Part 1: Skew carving gouge
While working on the Altai Project Logo carving, I discovered I needed a narrow skew in order to get down into some of the corners. I have a handfu...
Part 2: Handle for LAP engraving tool
I bought a Lost Art Press engraving tool a while back. The short metal handle works fine for putting it into a compass, but for freehand use, it’s ...
Part 3: Sharpening shelf for sharpening carving gouges
A while ago, I read Dave Fisher’s post on his Souped-up Sharpening Shelf and thought that sounded like a great idea to get some consistency in my g...
Replacing a Chair Back Molding
Part 1: Let's do this the hard way -- Designing for the CNC
My sister asked me if I would be interested in repairing the back of a barstool. The stool is metal but has (had) a piece of wood molding on the b...
Part 2: Wood prep and milling on the CNC
A couple of years before my sister asked me to make a new chairback molding. I had collected the trunk of a dead redbud tree from her yard with th...
3-Arm Kerfing Plane
Part 6: Open letter to Brent Hull
I sent an e-mail to someone that I admire. He responded, which is amazing. His response was short and sweet:
Good stuff!
Thanks for sharing.
B
...
Part 7: Little details
These are words I tell myself in the throes of the process:
Any fool can put something together. It takes a special kind of fool to design somethi...
Part 8: Blade cover
My town has a store that only sells imported Japanese hand tools. I only recently heard about it this year, but I wouldn’t doubt it if it has been ...
Traditional Portuguese Rajao
Part 10: Soundboard finished and installed
Fitted the braces and reinforcing ring to the inside of the soundboard.
[IMG_2648.jpeg][IMG_2650.jpeg]
Fitted the soundboard to the body. I suppose...
Part 11: Odds-n-Ends
Taking care of the other details now that the main assembly is complete.
Added the binding at the soundboard. Started out as 1 x 5mm Black Walnut. ...
Shop storage
Part 4: Box clamps box
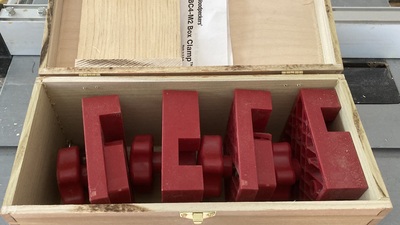
Another storage box, this time from ¼ inch poplar and Baltic birch ply for the top. Treated (this morning) with kakishibu, which darkens with expos...
Part 5: Small parts organizer
[IMG_7711.jpeg]
Just a quick and dirty project to use up some smalls and keep this organized when I’m doing something like this morning’s bench gl...
Part 6: Things fall down 2
My cheap-ass Harbor Freight dust collector has picked up a bit of a vibration. Enough so that last Sunday, it vibrated itself right off the French ...
Shaper Origin
Part 1: Chair Seat
The neighbor restores furniture and sells it at fairs. She picked up some ratty rattan chairs where the webbing was gone.
I said I could make her ...


