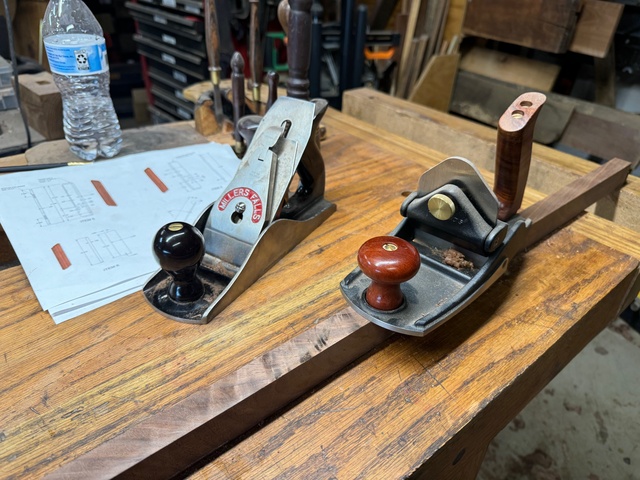
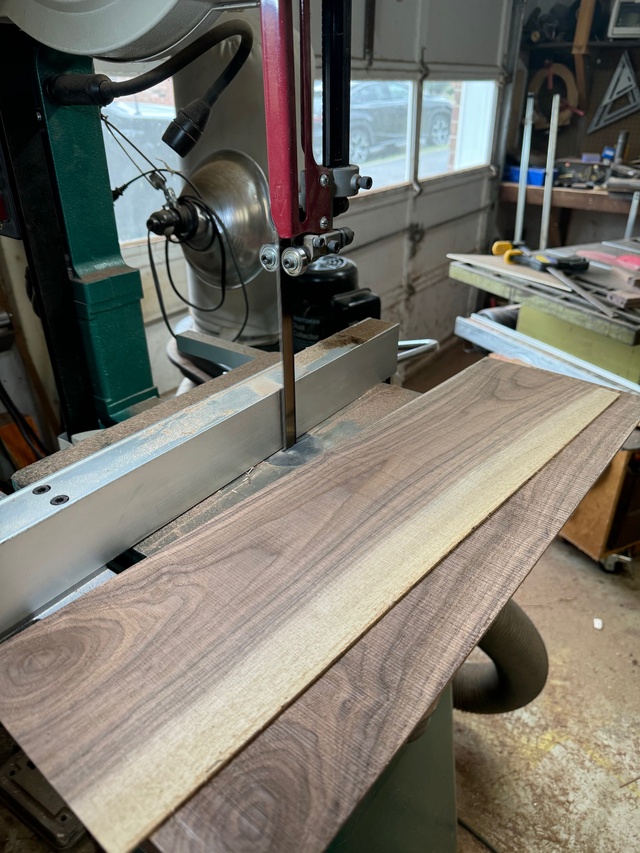
I got the bulk of the work finished up this weekend. I started with a dry fit of the case and then used it to cut the door members to length. Then I cut the rail and stile profiles in them on the router table. I used a particularly nice figured board to make the frame members which bit me in the butt. I tried planing to get good faces but the grain was too gnarly. So I ended up using my scraper plane to refine them to get all the faces flush.
After that I sanded them heavily but there were still places I couldn't get smooth. So I've been slathering them with shellac the last few days to seal/fill the grain and will sand the shellac back before I finish them with poly.
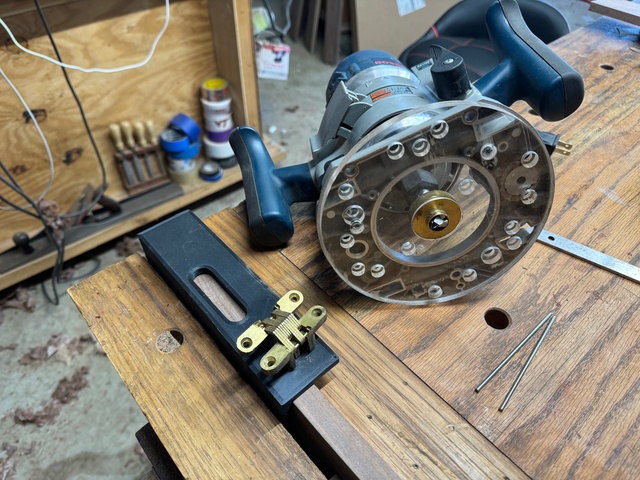
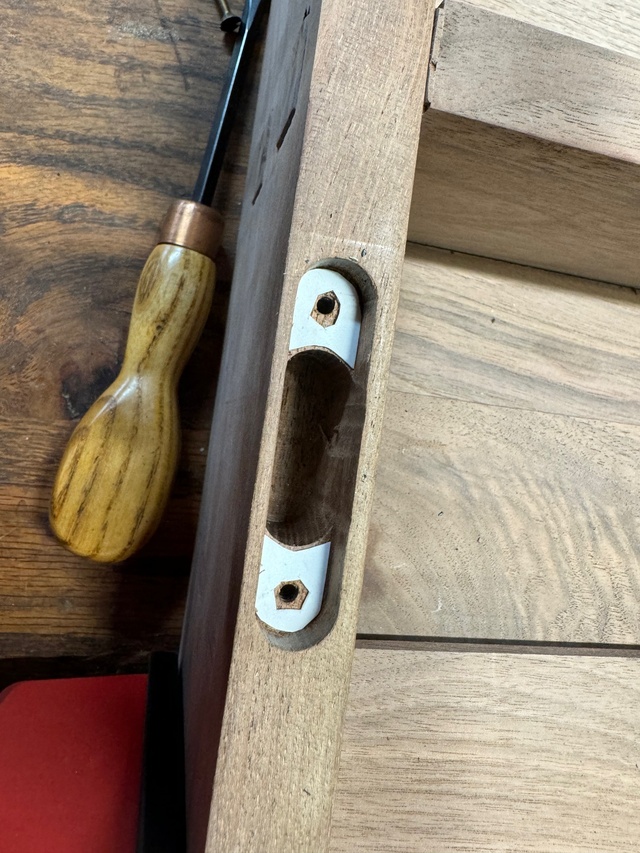
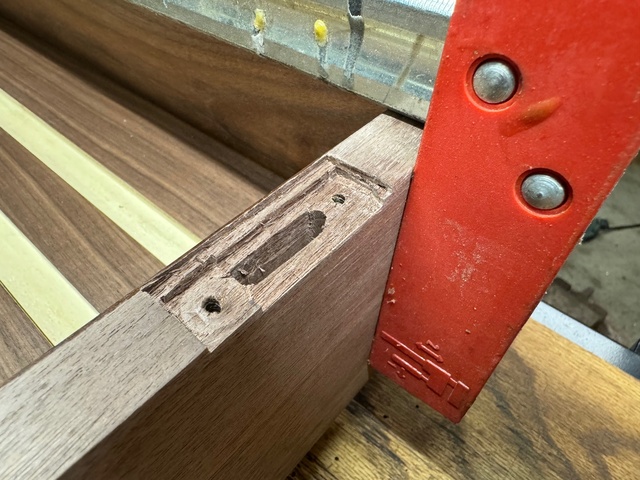
After that, all that was left was some router work. First the recesses for the invisible SOSS hinges. I had made and printed a router template for these hinges so I marked the locations on the case and door stile and went to work. I messed up and went a little deep on one so I made some shims from polystyrene and that did the trick. Everything went smoothly with fitting the hinges and I was happy.
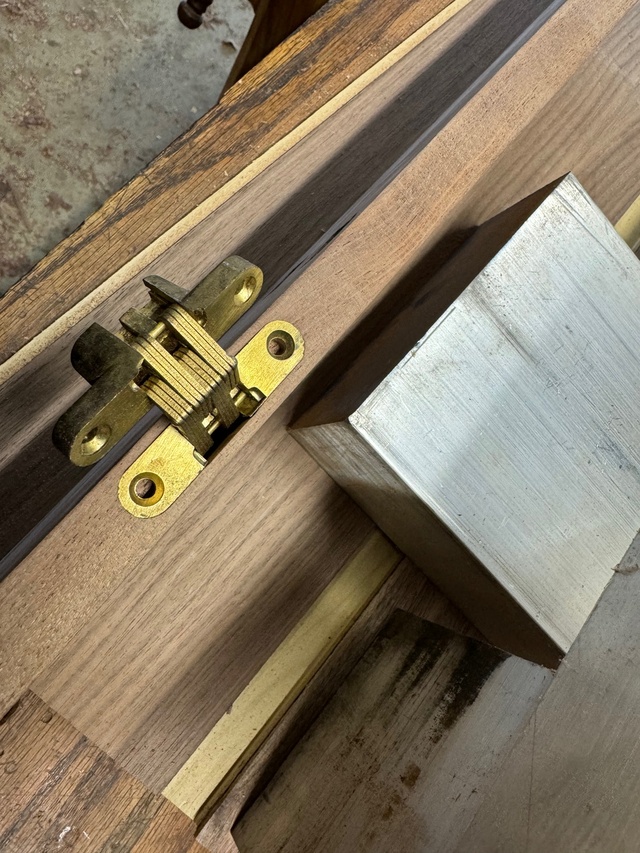
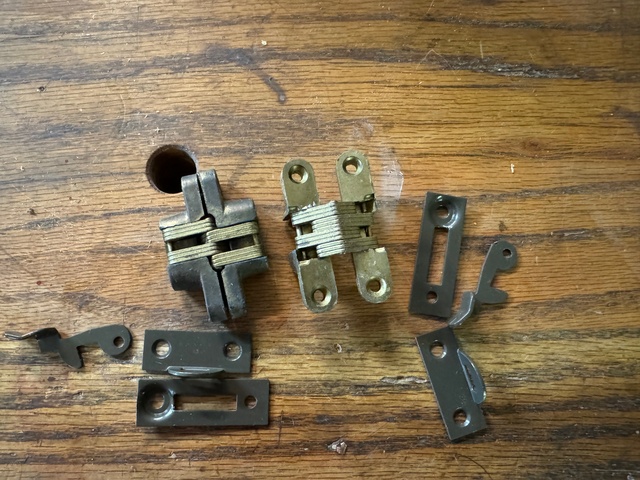
I had the brass hinges and RyanGI generously powder coated the latches that will be on the opposite side for me in a bronze color. I intended to darken my hinges to match more closely. But it turned out the hinges are brass plated and not solid brass. So while soaking in vinegar, it ate the plating away on the machined faces. They don't match but they compliment each other well so I decided to just go with what I have.
And those latches. Damn those latches. I originally looked at ones on Rockler but then found them cheaper on Lee Valley. Well, I didn't look closely enough. The Rockler version captures the latch between two plates. The LV version captures them between the wood and a single top plate. So the mortise has to have two levels. But the worst part is the slots in the catches are so much wider than the latches that it leaves about 1/8" slop. So I ended up having to recess the mortises for the catches about 1/8" deep in the door face in order for the latches to pull the door closed tight and keep it there.
Mortises were done with chisels.
I forgot to take a pic of the catches in the door frame. They don't look terrible but I'm not thrilled with the quality of the product. I'm really happy with the color and finish though so thanks Ryan!
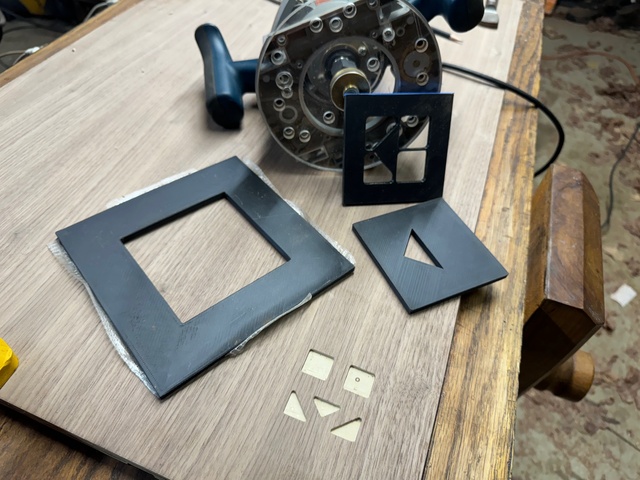
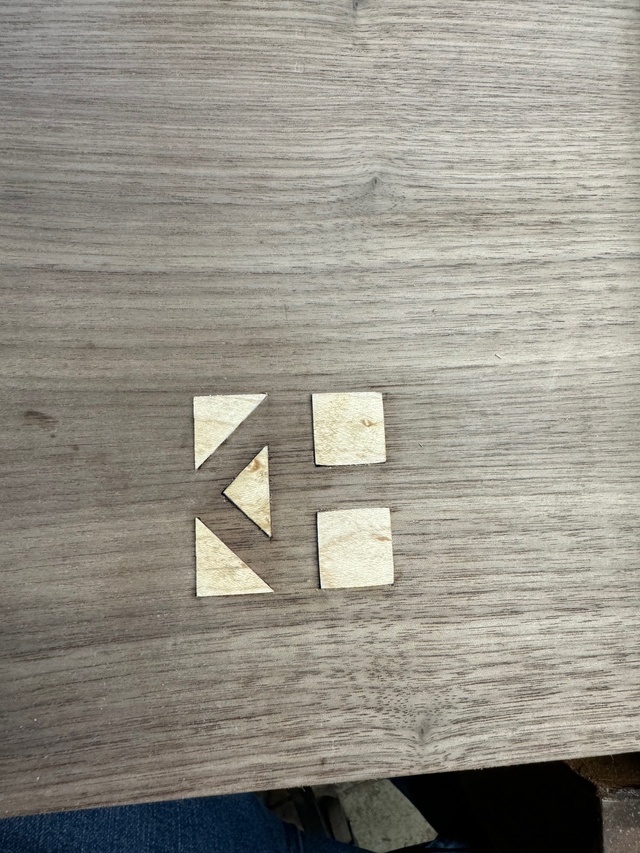
Final chore was inlaying my maker's mark in the back. I had 3D printed a frame and two templates that snap into the frame to use the Whiteside inlay kit with my router.
It worked okay but the thin walls one one of the templates flexed a bit causing one side of the square recesses to be out of flat. So I had to do a bit of chisel and sandpaper work but ended up getting a good result.
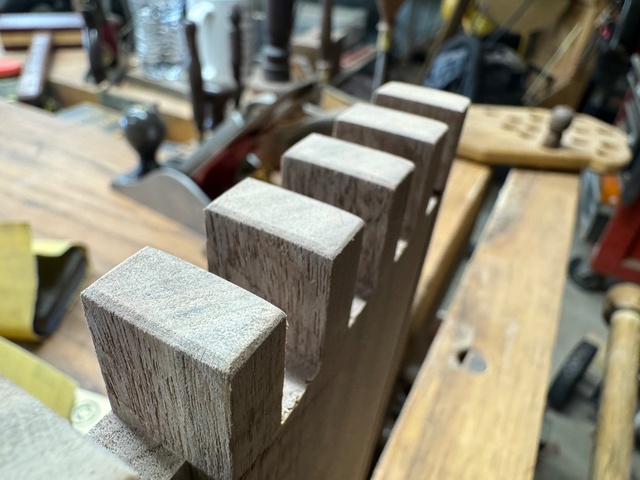
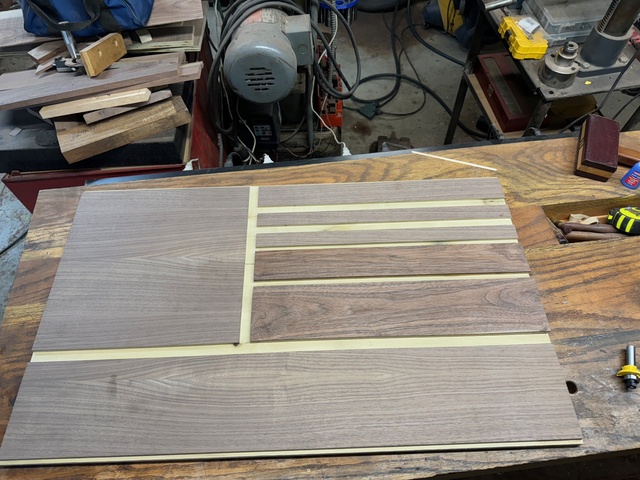
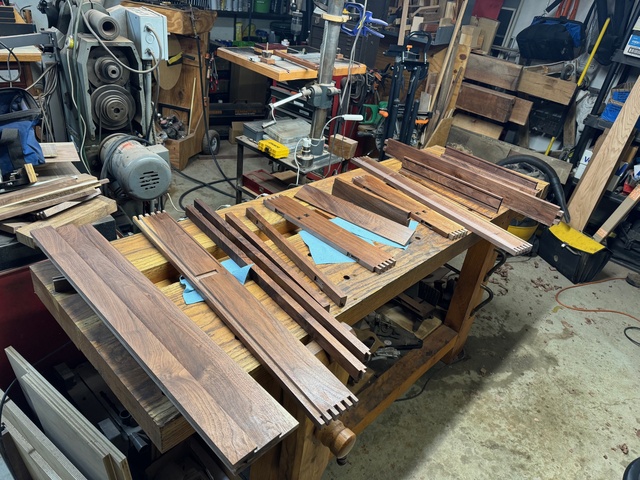
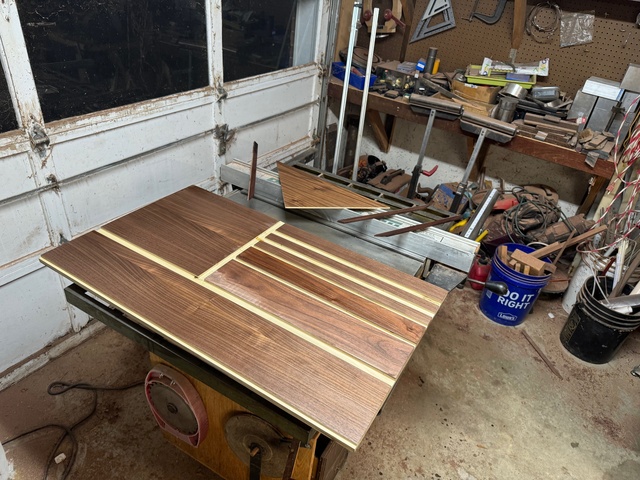
Then it was down to sanding. I had every intention of scraping these parts instead of sanding because it just looks better on Walnut. But time dictated that I sand instead. So I sanded all of the parts up to 320. I also used sandpaper and a sanding sponge to "pillow" the ends of the fingers and thru tenons.
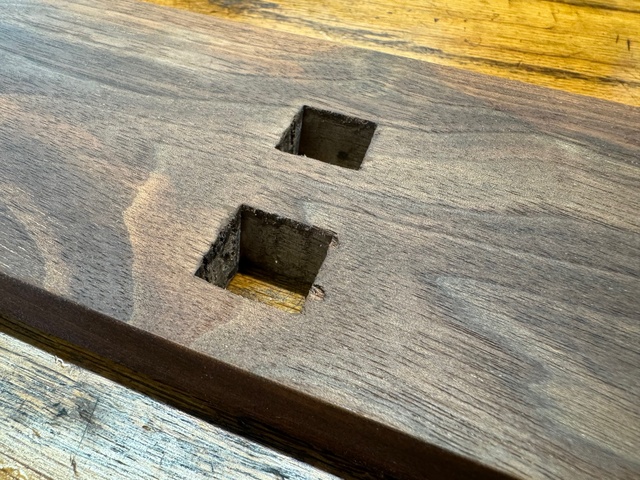
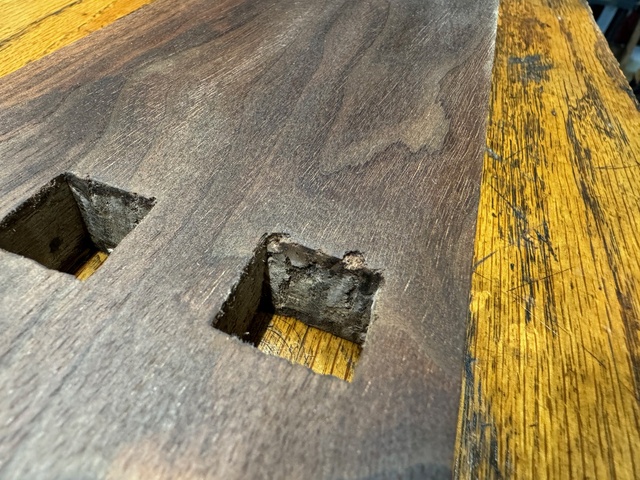
After everything was sanded I looked it all over and realized I still had two things I wasn't certain how I would hide. First was the tearout on the show face on the edge of one of the thru mortises. I got to looking a little and came to the conclusion it may not be typical tearout but that the wood seemed to have some sort of internal funky structure in that area. Almost like a burl but there is no evidence of it on the faces. In any case I resigned myself to just putting a couple of drops of black-dyed epoxy in those two craters after glue up. They're small and I doubt it will be noticable.
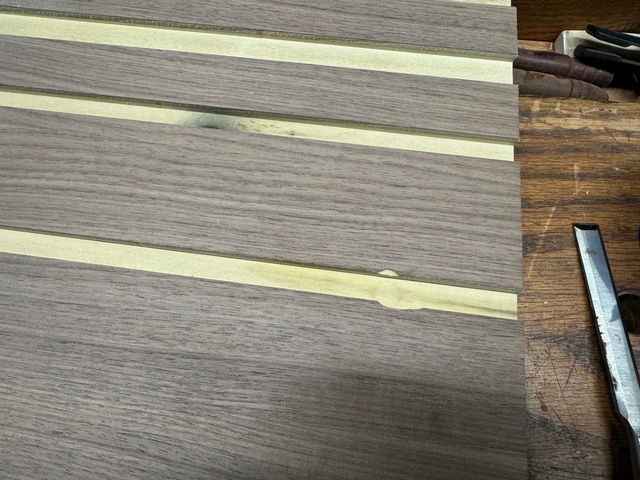
The other screw up was where my router table fence shifted on my while cutting one of the dados in the backer board.
I could do the same with epoxy but it would be much more visible. Then an obvious solution slapped me in the face and I couldn't figure out why it hadn't dawned on me sooner. I set up my bandsaw and sliced a couple veneers off a piece of scrap. Since the two sections with the gouges are between two of the coin shelves, a difference in grain or tone or a slightly thicker veneer won't be noticeable. So I cut a couple pieces the right size and glued them to the plywood and then ran a flush trim bit around them to flush them up to the dadoes.
With that off my mind, I continued sanding then blew everything off with compressed air and wiped it down with mineral spirits. Then rather than going straight to glue up, I decided it would be better and not take any additional time to prefinish the interior faces before glue up to make it easier to clean up squeeze out. So I applied 2 coats of armor seal to all my pieces being careful not to get any on glue surfaces.
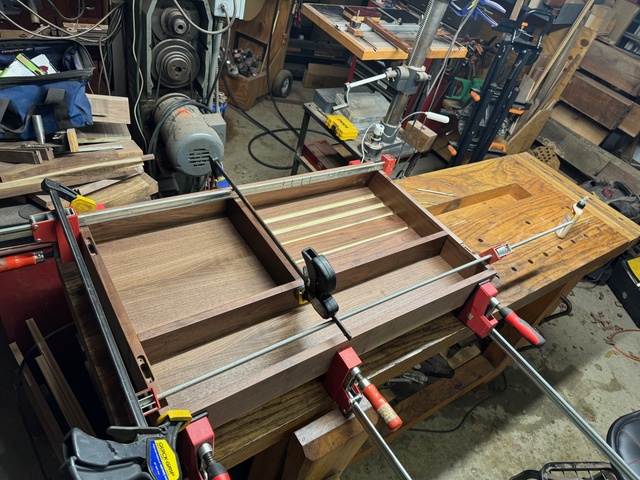
After the second coat had cured, I went for the glue up. It went pretty smoothly. I have been worried about getting the full glue up assembled and clamped before the glue started to set. I applied glue to the rabbets on the plywood and in the dadoes for the horizontal and vertical dividers. Then I sat the case top and bottom members in place and the dividers in place. Then I got the case sides started into the fingers for the box joints and then squeezed some glue into each finger opening from the inside of the case. I figured that would keep the majority of the squeeze out on the inside corners where it was easier to wipe off the prefinished faces. It worked 😊 The only F-up was that in my haste, I neglected to put any glue on the thru tenons. Rather than taking it apart to do so I decided it wasn't needed. Between the box joints at the corners and the horizontal divider being glued into the backer, nothing should be able to move. And the tenons are a very tight fit anyway. So after a fairly easy round with a glue bottle and wrestling with clamps, everything was in place where I wanted it.
And that's where I'm at. Tonight I will take it out of the clamps and sand all the shellac back on the door members. Then I'll check the dry fit of the door again with the glued up case to be sure everything is square and flush. Then the last thing will be to cut the plexiglass panel to fit in the door grooves. Then I'll prefinish the door members before I glue it up to ensure I don't get poly on the plexiglass. Then I'll put a third coat of poly on all the coin shelves and the first coat on the exterior faces of the case assembly. Then tomorrow I'll glue up the door and glue the shelves in and put a final coat of finish on everything. Then Thursday morning I'll attach the door and hinges/latches before I leave at noon to go to the retirement ceremony. Talk about pushing a deadline...
Ken, you have put a lot of work into this display case. I'm looking forward to seeing the final product. It's going to be beautiful. Something any veteran would be proud to have and display!
Thanks guys. I will post it as a project when I finish.
It will hang on the wall Splint. I have an Aluminum cleat hanger I'll attach to the back and provide the mating piece to hang on the wall for my BIL to hang it with.
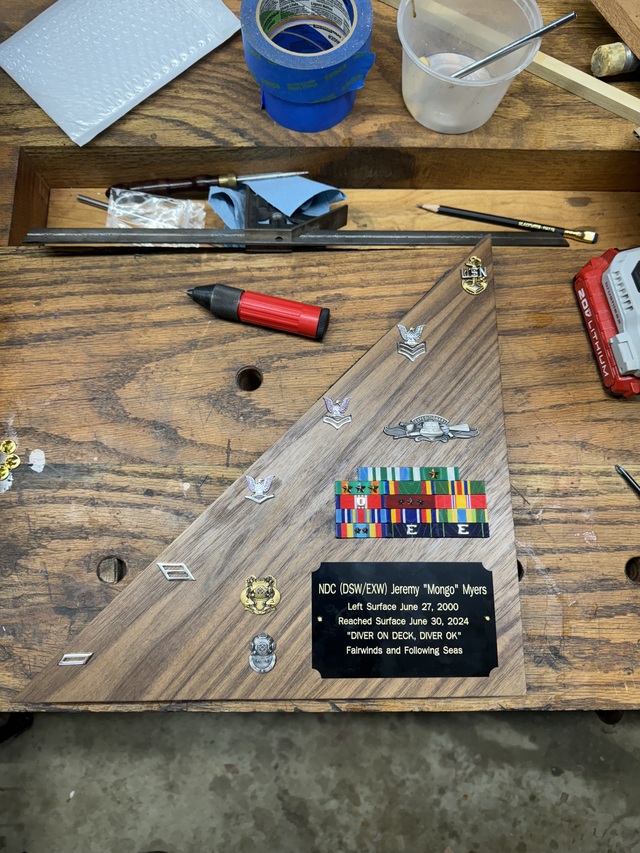
CRAP! You just reminded me that he sent me all his medals and stuff and I'm supposed to put them on the board for him. I forgot about that. He wanted me to do it because there will have to be pilot holes drilled in the wood. I may just take drill bits with me and do that with him while he's there. I'll say it's because I wasn't sure how to arrange them but it's really because I don't have time...
I think some branches even have a hierarchy of placement for items other than ribbons/metals. Military folks tend to get twitchy when things are out of order. I guess spending a career closely following doctrine and policy with consistent precision will do that too you!!
Ryan/// ~sigh~ I blew up another bowl. Moke told me "I made the inside bigger than the outside".
I actually looked back and he sent me a sketch a few months ago for how the pins all need to lay out. So I guess I’m on the hook to do it. Luckily I’m waiting gor glue to dry right now anyway so I’m gonna get em mounted.
You were right Ryan. I looked at the leftover insignias and there are right and left handed of each so I swapped out the second one so they are both oriented the same.