


Share your craft projects
Make new craft buddies
Ask craft questions
Blog your craft journey

HokieKen
8768 posts
and
55 followers
in over 3 years
in over 3 years
Military Retirement Shadowbox #1: Up-front Work
This is
part 1
in a
7 part
series:
Military Retirement Shadowbox
Last July, my sister sent me a message that my BIL, a Navy Diver, was going to retire in March. She said he wanted a custom shadowbox and didn't like the ones the Navy provided. She said he mentioned wishing I could do it so she asked and of course I accepted. That was in July. A couple of weeks ago I realized I have 2 months left so I got started...
He wants the following:
He wants the following:
- It to have a section for his retirement flag
- A section for his ribbon rack, a small plaque, rank devices and pins
- The rest is just for challenge coins and he wanted it to hold 100+ coins ranging in size
- All Walnut
- A hinged door that makes the coins easily accessible (he trades them frequently)
I realized that I was going to need to discuss designs with him and get information from him on all the stuff that will go inside so I told my sister that it would go better if this didn't need to be a surprise. She agreed so he an I began discussing.
His challenge coins ranged from a little under 2 inches and 1/8" wide up to this guy:
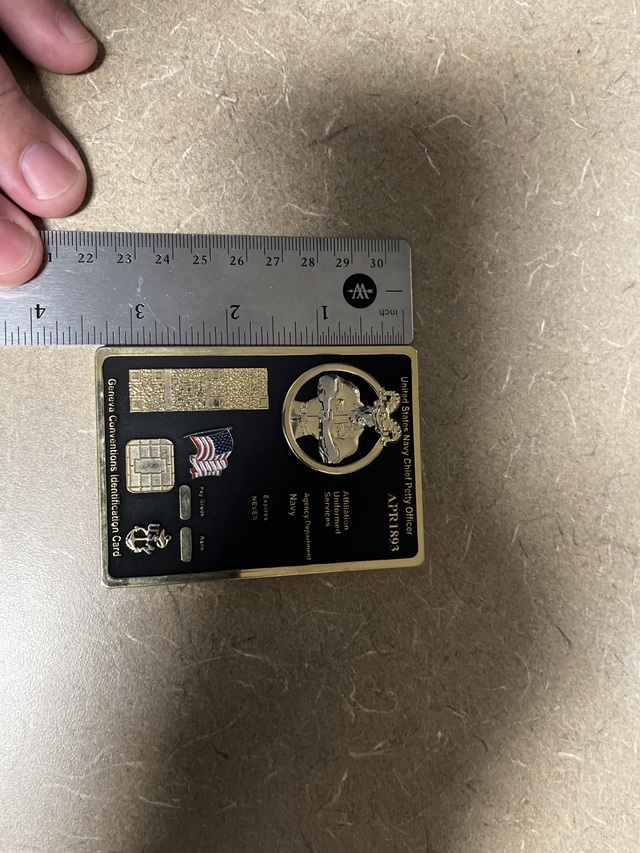
which is his largest. He said most are 3/16" thick and the thickest is 1/4" and that the majority are 2-2.5" in diameter.
He also sent pics with a scale to show the size of all the items to go in his decoration section. Seven rank devices, two "pins" (I'm not sure what they are actually called) and his ribbon rack. And my sister said she's having his plaque made and it will be 3" X 5".
The flag will be 4'X6'. Unfortunately, I found a lot of information on the size of folded flags but very little on that particular size. I did find this:
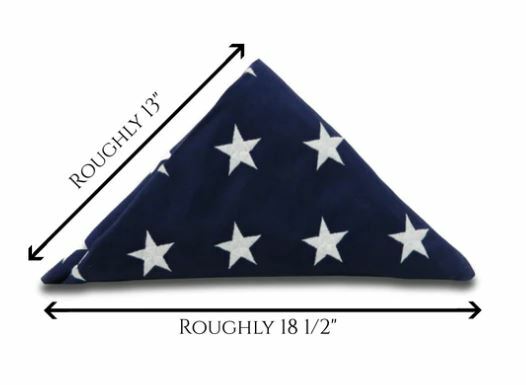
but the site said the dimensions vary by up to an inch depending on how tightly the flag is folded. He'll just have to fold it right 😆 I sized it for 13.5" on the short sides and will have it so it can be a little smaller without gaps showing.
The decor in the room where it will hang will match his Walnut request well and the wood furniture they have is very nice but also very plain. Think Shaker or Amish furniture. Straight lines, no moldings or purely decorative embellishments. The only thing that isn't in that vein is a side table I made them a few years ago with an endgrain cookie for the top. But even the base on it is straight, splayed oak legs.
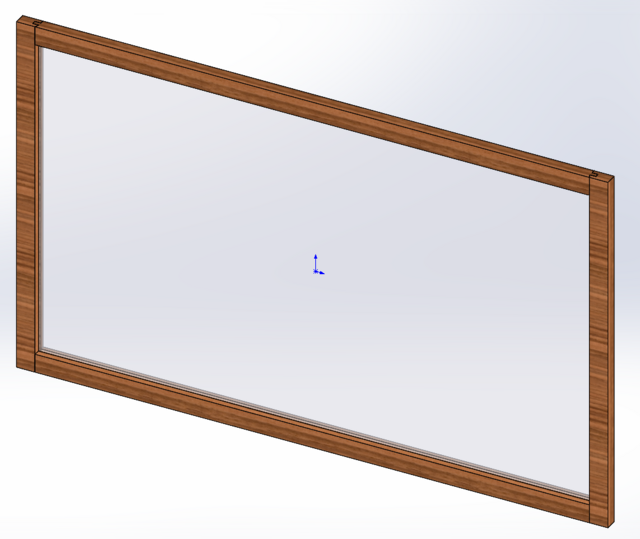
So I began to formulate an idea in my head then eventually on the computer. I would periodically send him a screen grab and get his feed back and we finally got to here as the final design that I'm ready to start making dust on:
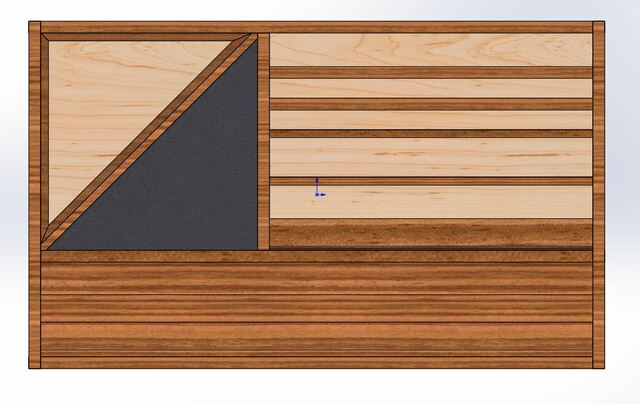
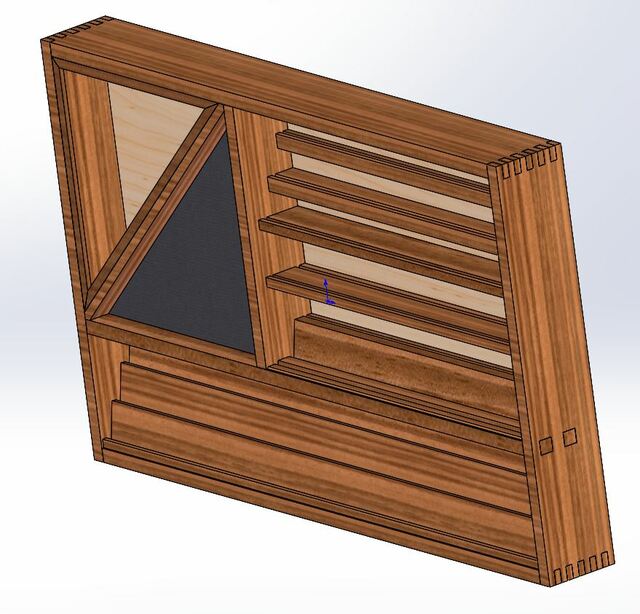
For scale, it's 36.5" wide and 22" tall and the case members are 3/4" thick. If I rotate it a little, you can see how the coin shelves are laid out:
And I know the background is light-colored but I just did that for contrast. It will be Walnut as well.
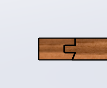
Construction is box joints on the case and the center cross-member will be thru-mortised into the sides. I debated cutting dovetails instead of box joints (and haven't ruled it out completely yet) but time and not a lot of extra material to remake any botched pieces has me coming back to box joints. I also debated leaving the joinery about 1/8" proud but I decided I like the look of it better when the door is on with them flush. I also started out with all the shelves being mortised through but decided that was overkill on the joinery and it made the sides of the case too "busy." I also debated just mitering the corners but I didn't like the look of that either.
The door will be rail and stile construction.
I didn't like the look of the profile on most of the router bit sets I looked at but then I found one that had a simple chamfer on the inside edge and liked the look of it with the case.
The door members will be 1.25" wide so they'll overlay the sides of the case by 1/2" and be flush on the outside edges. The insert will be an optical grade plexiglass. I asked him and he said he would prefer that to glass for weight and strength reasons. And I prefer it because I don't have to count on a glass shop to hit my dimensions properly or wait for them to cut it.
So when I had the design laid out, I populated it with some representative pieces of the stuff that will go inside to show him how the coins would look and how all of the decorations would fit.
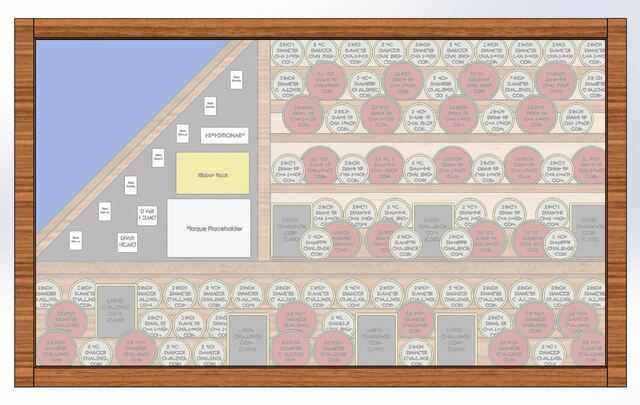
He gave me an enthusiastic "I love it!" so I'm off and running.
I just have a couple of issues left to iron out. First is hardware. I can't decide on hinges and closure. I'm thinking concealed hinges but I also like the look of clasps for the closure. Sorta like the pic below but I'm leaning to having two clasps instead of one.
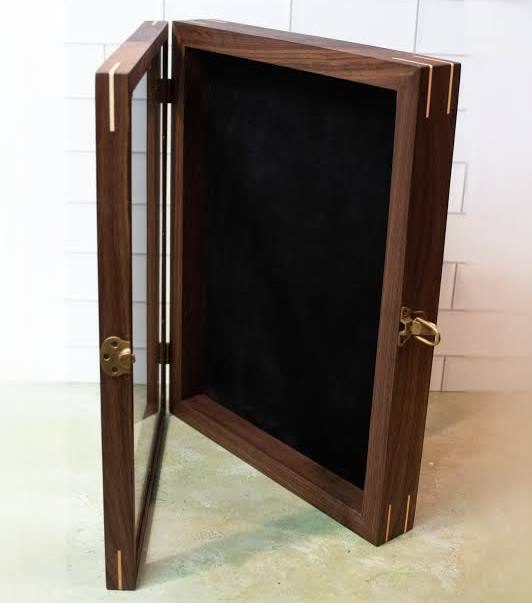
So I'm thinking maybe the hinges should be visible on the other side to balance it? Still pondering it and haven't found any specific clasps that spoke to me yet. I'll probably find those first then find hinges that match in style and material.
My second sticking point is how to get the flag in and make sure it doesn't fall against the door. I asked about having a glass insert over it and he said he'd prefer not. And I worry about how it would look through two seperate panes anyway. So I designed in these "lip" pieces that stick out 1/2" that will (a) hold the flag in its place and (b) cover any small gaps there may be on the edges.
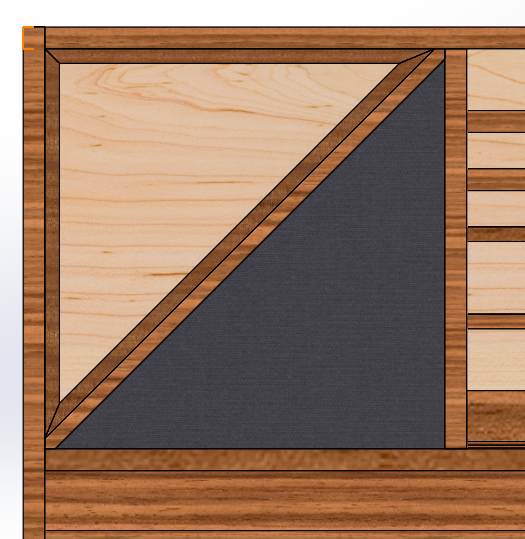
But, there will be no access from the back side. So how to get the flag in and pushed smoothly up against the lip if you have to cram it in to get it past the lip? I'm not sure. Maybe I'm overthinking it and it's not really an issue? Right now my best idea is to leave this divider piece and the lip that is attached to it with no glue so he can slide them out, get the flag in position, and slide them back in underneath it.
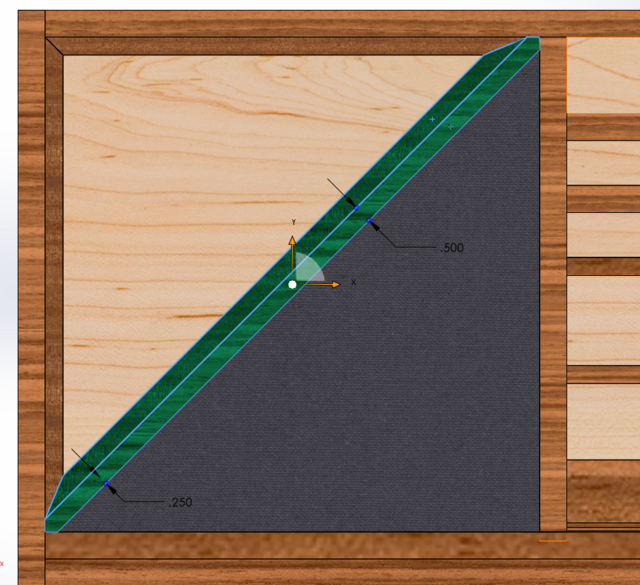
That should work fine but I worry that if it's "floating" that the joints at the miters of the lip pieces may not be completely flush. At the moment, that divider piece is just designed to be glue. The miters on the ends to get a precise fit will be lovingly tuned so it does so. So maybe the glue is unnecessary and I can rely on a tight fit of that piece to keep the miters tight too. I could cut a dado in the back piece for it but I'm not sure that would help anything.
For the black piece where his decorations will go, I'm going to use a piece of Kaizan foam to space it out so they aren't recessed so deep. He isn't sure if he wants the background of that section to be Walnut or felt. So I'm going to make it reversible with a walnut piece on one side he can drill pilot holes into for the pins and a piece of felt covered cardboard on the other side if he likes that look better. I'm debating adding a lip to that side as well in case my angles get a little off and flipping it over causes any gaps at the corners. But I'll wait until I get the piece fitted in and see if it's a concern.
Those two open issues don't prevent me getting started though. I haven't made anything this involved in a while so I had to give the shop a LOT of attention over the weekend to get it back in workable shape. But it's ready to roll now. I pulled out all my Walnut last night and laid out all the pieces to make sure I didn't need to go buy any. I think I barely have enough by the time I skip all the cracks and knots. Rough sawn air dried lumber can be persnickety.
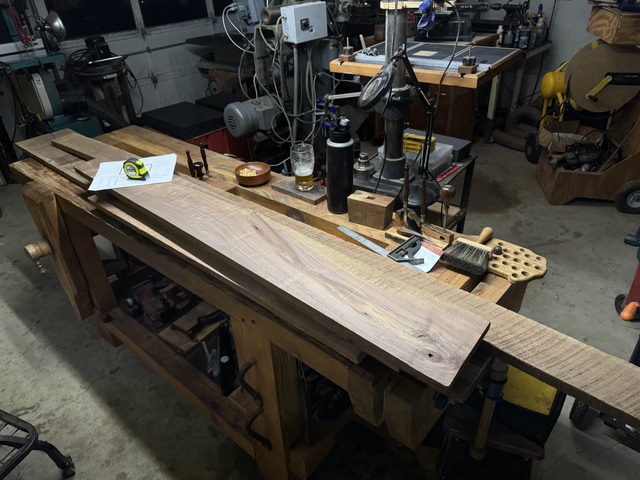
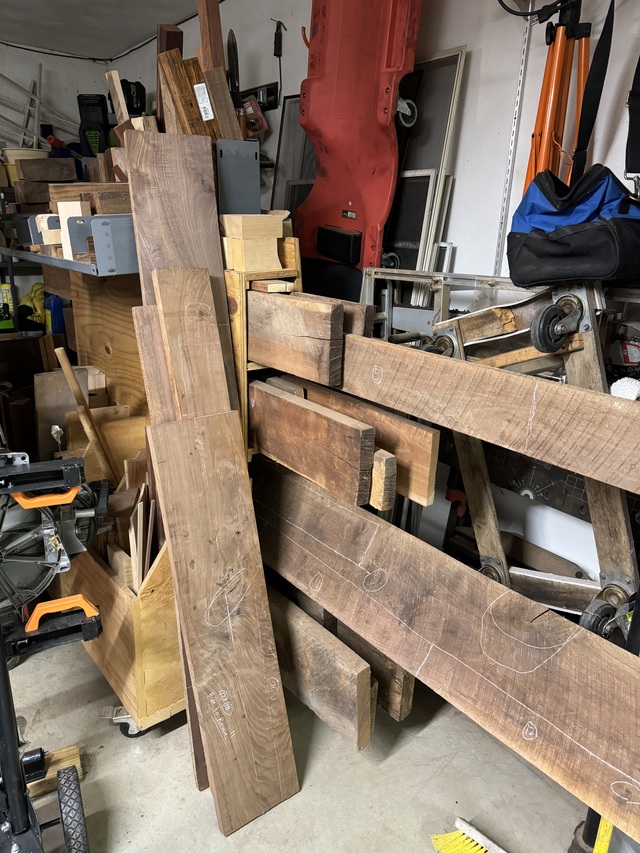
My only holdup is that I have to get the case pieces from two different boards so there won't be any grain continuity. But, I don't think that will really be an issue with the box joints breaking them up at the corners. I did have one board I can get all the door pieces from so there should be consistency there.
I also ordered the rail/stile router bit set, a 1/4" piece of plexiglass and a 3/4" piece of Walnut plywood for the back. So next up will be milling these boards. It's supposed hit 50s the rest of the week after today and I have to open my bay door for boards this long so maybe I'll get started in the evenings. But having time in the evenings is a crap shoot so maybe they'll sit just where they're at until next weekend...
47 Comments

That's a really well thought out design Ken! I wouldn't worry about fitting the flag into your opening. They can tuck in behind the lip pretty easily.

nice design kenny. i be following along.
working with my hands is a joy,it gives me a sense of fulfillment,somthing so many seek and so few find.-SAM MALOOF.
Steve Rasmussen
That's a really well thought out design Ken! I wouldn't worry about fitting the flag into your opening. They can tuck in behind the lip pretty easily.
I was hoping somebody would actually read all my drivel and comment on that. It has really been bugging me! I even tried to design in a rear-access door but I designed it to be hung with an aluminum cleat so it sits flush to the wall and I'd have to move the cleat too low to allow rear entry. Leaving it as-is would be a huge weight off my mind.
Thanks pottz. I'm debating on violating the "all Walnut" request and using some of your Cocobolo for the trim pieces around the flag 😁
Steve, have you ever done a box for a flag that size, 4x6? It seems to be a less popular size. I'm just curious if you know how deep the box for it was? I saw 2-3/4" online somewhere so I designed it with 3" depth in there and figured I could give him some foam to fill in behind it if necessary.

I agree with Steve about the flag being able to tuck in behind the lip.
"Duck and Bob would be out doin some farming with funny hats on." chrisstef

That is a very cool design. Looking forward to seeing how that turns out.
--Nathan, TX. Hire the lazy man. He may not do as much work but that's because he will find a better way.

Yeah, the flag will tuck in just fine, no issues at all. It can be ‘fluffed’ to fill in space as needed. As for depth, that can be controlled (at least a little) but how neatly the flag is folded, so I wouldn’t sweat that too much either. If anything, err on making the compartment too deep, because you can always install a filler to get the depth just right. No one (most likely) will every remove the flag…so it can also be secured in place or to a backing to help hold shape if needed. Gonna be great!
Ryan/// ~sigh~ I blew up another bowl. Moke told me "I made the inside bigger than the outside".

Looking forward to it!
MosquitoMade.com

cant wait to see it but now i understand why your not in the swap
*TONY ** Denver * ALWAYS REMEMBER TO HAVE FUN
Yeah Tony, I have a hard deadline on this one and haven't made the first bit of sawdust yet so I figured I better sit out the swap.
I appreciate all the comments on the flag fit. I'll just go with my original plan. If the divider piece slides in nice and tight and the lip on the trim pieces stays tight at the miters, I'll still leave it loose but if not, I'll just glue it in place as planned and have confidence the flag can be inserted without issue. I didn't mention it but my BIL has a bad case of OCD. As in he vacuums his car EVERY time he gets out of it and washes the dishes AS he unloads them from the dishwasher. So while he'd never say anything to me, if the flag doesn't fit perfectly or there are gaps in the miters, it will drive him bat sh$t crazy. Now that I think about it, maybe I will intentionally make the miters a little gappy in one corner 😂
I appreciate all the comments on the flag fit. I'll just go with my original plan. If the divider piece slides in nice and tight and the lip on the trim pieces stays tight at the miters, I'll still leave it loose but if not, I'll just glue it in place as planned and have confidence the flag can be inserted without issue. I didn't mention it but my BIL has a bad case of OCD. As in he vacuums his car EVERY time he gets out of it and washes the dishes AS he unloads them from the dishwasher. So while he'd never say anything to me, if the flag doesn't fit perfectly or there are gaps in the miters, it will drive him bat sh$t crazy. Now that I think about it, maybe I will intentionally make the miters a little gappy in one corner 😂
Just make each corner 85/95° instead of square.
--Nathan, TX. Hire the lazy man. He may not do as much work but that's because he will find a better way.
😂
"Duck and Bob would be out doin some farming with funny hats on." chrisstef

Looks like a great project. I love new challenges and it looks like you'll get some new ones in this one.
Lincoln - "Give me six hours to chop down a tree and I will spend the first four sharpening the axe." Dave in AZ
Ugh. So I sorta found some hardware I like. I really like this catch from Rockler. I would use two of them to hold the door closed. And if I use those, I'd like to use concealed hinges like these so that the only hardware visible is the latch on the clasps.
Problem is, I don't really like the black. I'd like to have an antique bronze type finish. But that seems to be a no-go. Rockler is the only place I've been able to locate a hidden clasp like that and they only have it in one finish. I have found the hinges several places but not bronze in the size I need. I really like this hinge because it hides the screws and has adjustability in the hinge. But they don't make the size I need in a bronze finish either. And even if they did, I would want the hinges to match the latches.
So am I just stuck using the black or does anyone have google-fu stronger than mine?

Sounds like a wonderful project. Don't have any advice to offer from experience, but look forward to seeing the project develop.
Few thoughts...I may have missed the solution, but could you have the flag section placed from the back to place/secure the flag and his other items, and then make a hinged door for the section with the coins that need to be accessed? I see the bottom section goes below the flag part, so perhaps the hinge on the right and some type of magnet to hold it closed?
Few thoughts...I may have missed the solution, but could you have the flag section placed from the back to place/secure the flag and his other items, and then make a hinged door for the section with the coins that need to be accessed? I see the bottom section goes below the flag part, so perhaps the hinge on the right and some type of magnet to hold it closed?

I like the looks of this! My eldest son is a TSgt in the USAF. He wants a coin rack and I want to make a retirement shadow box sooner rather than later, as I don't know which side of the turf I'll be on in 9 years. Combining both would make it easier. I folded up a flag that is 5' on the long side and folded not too tightly it's about 13" on the hypotenuse. Not sure how your flag will come out so much bigger. I'd ask your BiL if he would like Navy Blue cloth or paint on the flip side of the walnut ply.
The Other Steven
Kenny, I don’t know how much you ‘like’ those catches, but if they’re really what you want I can powder coat them for you in a more antique bronze finish. Offer’s on the table…
Ryan/// ~sigh~ I blew up another bowl. Moke told me "I made the inside bigger than the outside".
I looked at the specs on the latches and the specs say bronze finish. the hinges are black.
I would contact them and verify.
I would contact them and verify.
"Duck and Bob would be out doin some farming with funny hats on." chrisstef
I noticed that too Duck but if you look at the user pics in the reviews, they are definitely black.
Ryan, that might just be a winner! If it’s not a lot of trouble. It is all concealed hardware so it’ll only be visible when open so it’s not a showstopper. I just don’t like black on Walnut. I’m going to have another look in the morning when I’m fresh and if I’m still stuck on those, I’ll get in touch. I’d still have to find hinges in that finish too. I don’t think you could powder coat those because of the construction with all the small metal plates. If I have to pick between the finish I want and all the hardware matching, matching will win.
Ryan, that might just be a winner! If it’s not a lot of trouble. It is all concealed hardware so it’ll only be visible when open so it’s not a showstopper. I just don’t like black on Walnut. I’m going to have another look in the morning when I’m fresh and if I’m still stuck on those, I’ll get in touch. I’d still have to find hinges in that finish too. I don’t think you could powder coat those because of the construction with all the small metal plates. If I have to pick between the finish I want and all the hardware matching, matching will win.
DL, this site has the dimensions of different size flags when folded. It says a 3x5 is 13-1/2 on the hupotenuse so that’s similar to what you got. It’s the only reference I could find for a 4x6 flag so I had to go with it and hope for the best.
I did ask him about cloth or Walnut and he said he “thinks” Walnut so I’m giving both options on the same insert. I didn’t ask about color, just assumed black but that’s a good point. I’ll ask him what color felt to use.
I did ask him about cloth or Walnut and he said he “thinks” Walnut so I’m giving both options on the same insert. I didn’t ask about color, just assumed black but that’s a good point. I’ll ask him what color felt to use.