


Share your craft projects
Make new craft buddies
Ask craft questions
Blog your craft journey

RyanGi
5558 posts
and
51 followers
in over 1 year
in over 1 year
More from RyanGi


Mug warmer/bench caddy…and bonus item for 2024 Surprise Swap


I was drinking coffee in the shop, thinking about what to make Tony for the 2024 Surprise Swap. Deep in thought, and doodling a bit, my coffee got cold…and my drafting pencil ended up out of lead. Which lead me to an interesting thought…cold coffee and lost pencils are not my favorite things…maybe that was an idea for the swap?!?
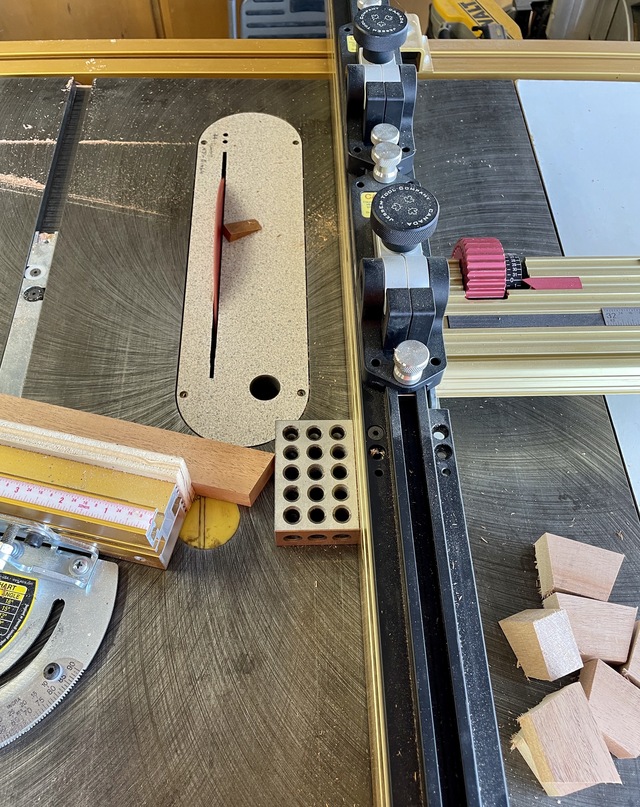
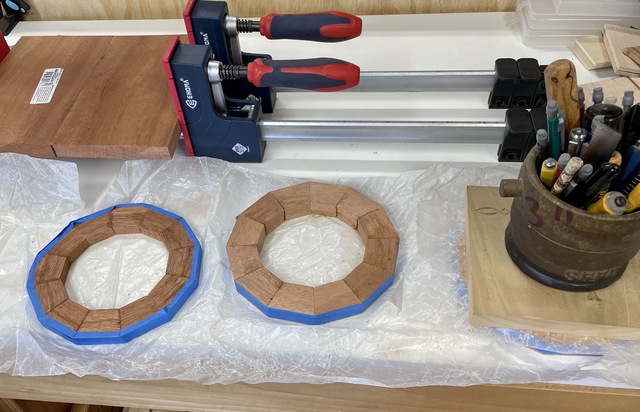
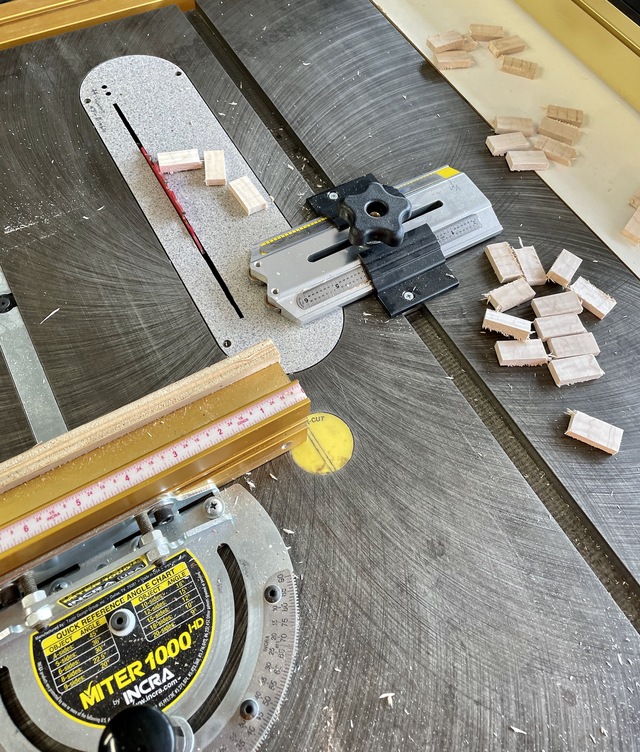
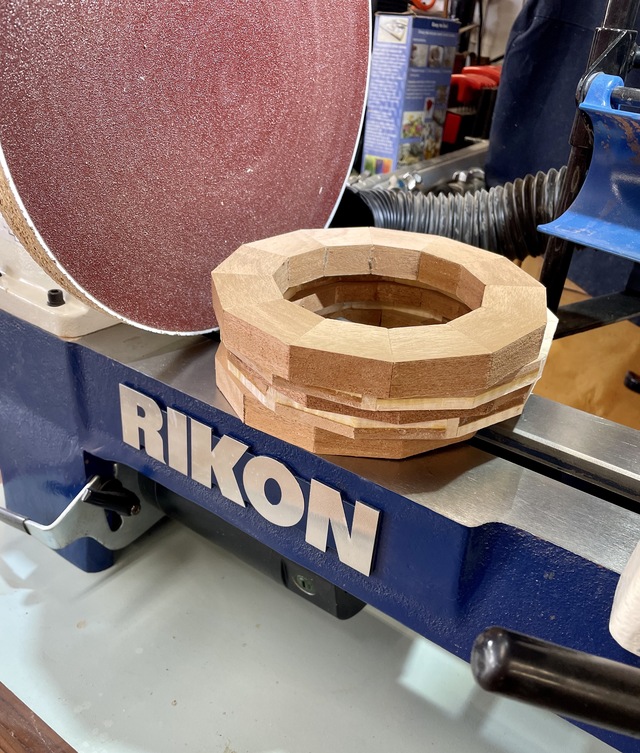
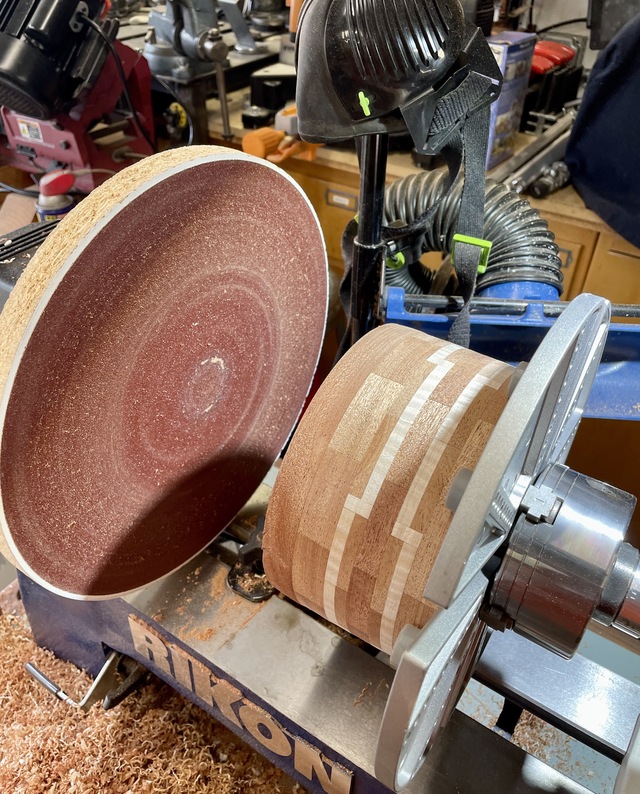
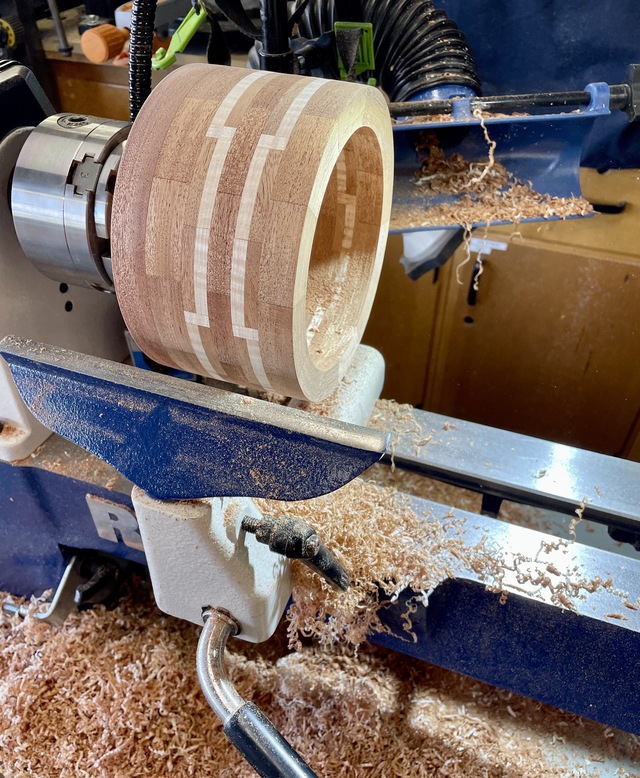
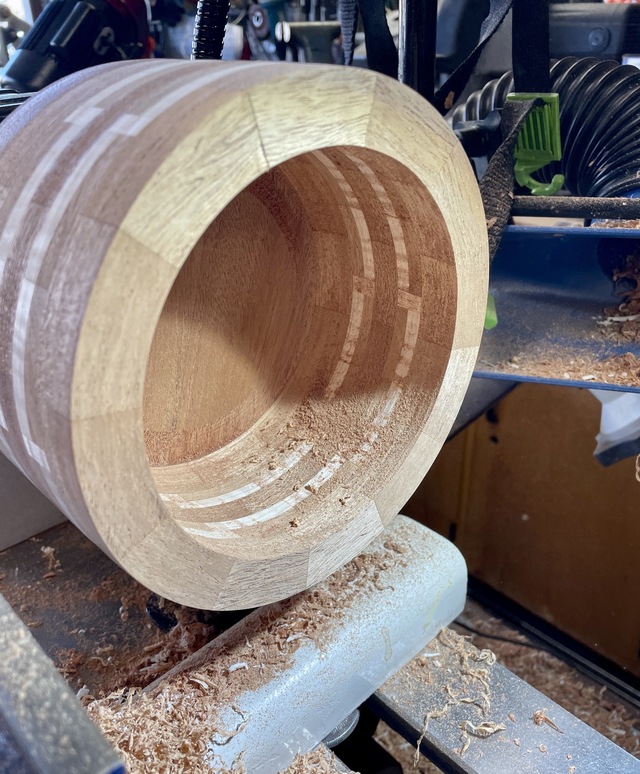
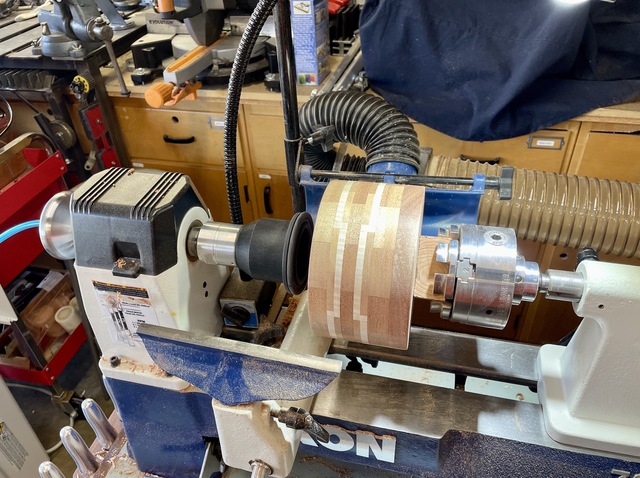
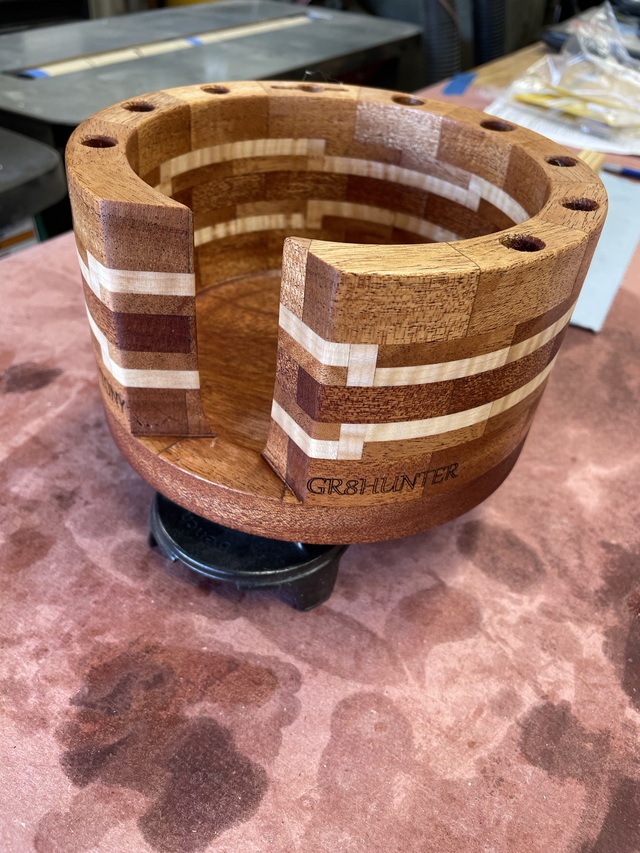
What I drew up was a desk top pencil caddy, with a mug warmer. After ordering up mug warmer from Amazon, I started by cutting up some pieces of sapele, walnut and maple for a segmented bowl sized for the mug warming plate, with a feature ring for a little snaz. Got it all glued up using the lathe and my Cole chuck. I glued on a chuck block, but just couldn’t get it to square up, so I squared everything up in place using the disc sanding plate I made, then glued on another chuck block. This was finally square enough to turn, so away we went! It turned pretty easy, and I’m happy with how the feature ring came out. Then I used a vac chuck to turn off the chuck block.
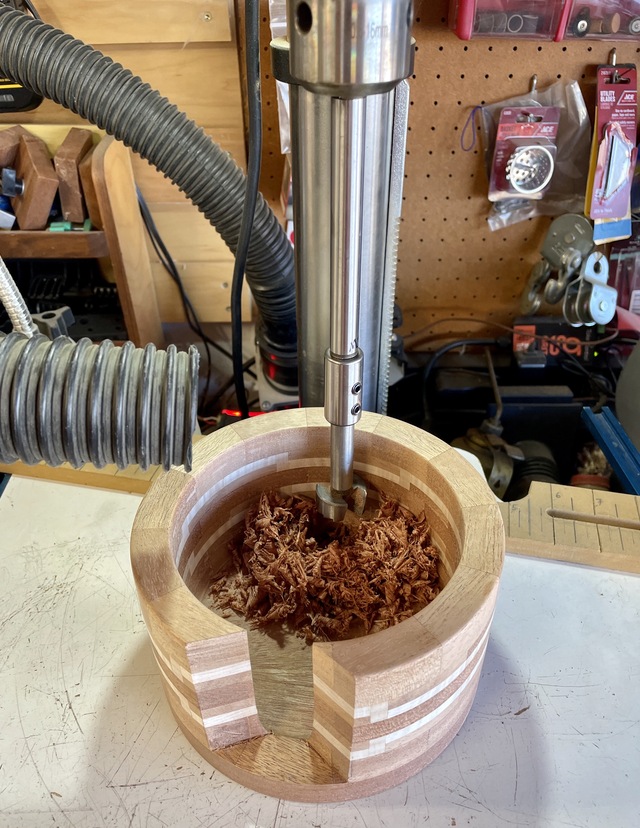
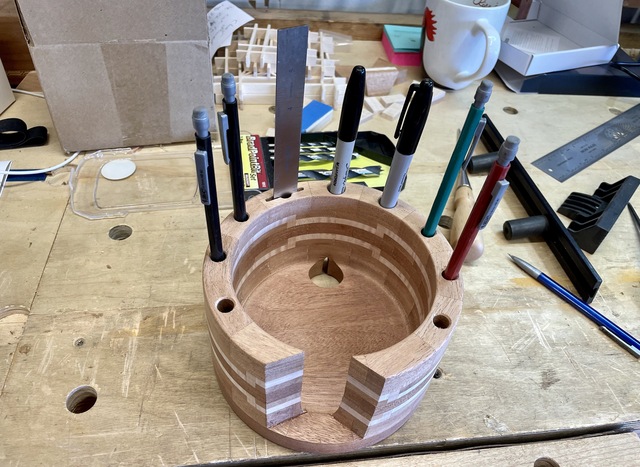
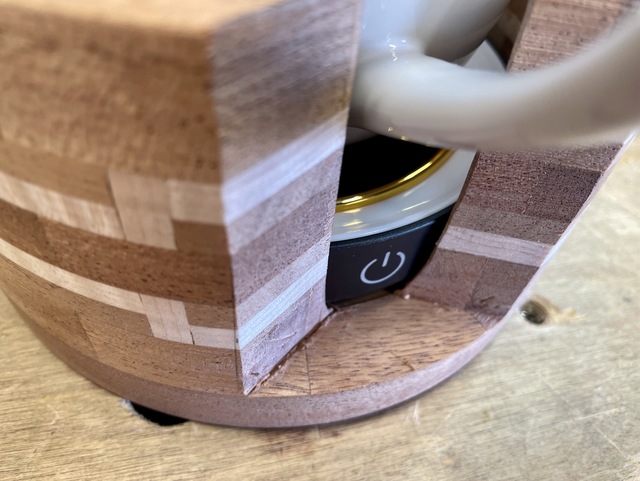
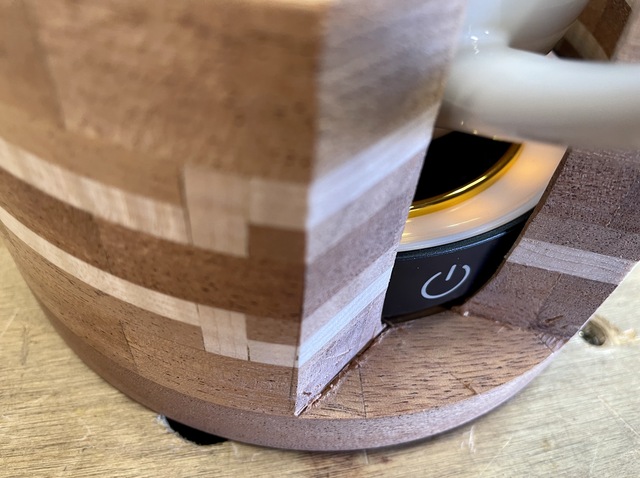
I cut an opening vertically down the front for the mug handle, which was a bit of a trick to not damage the bottom plate but keep machine-straight lines. After that, I drilled and chiseled out a space on the back/bottom for the power cord. Then I sized and drilled holes around the rim for pencils and a couple sharpies. And since I lose my little 6” rule regularly, I carved in a little slot for one of those as well. Some laser work to decorate it up and finished with some Odie’s oil. I used a couple dabs of silicon to hold the warming plate in place and control the cord after it was all said and done…but evidently I completely failed to take the standard ‘end of project glamour shots’!! Dumbass…
What I drew up was a desk top pencil caddy, with a mug warmer. After ordering up mug warmer from Amazon, I started by cutting up some pieces of sapele, walnut and maple for a segmented bowl sized for the mug warming plate, with a feature ring for a little snaz. Got it all glued up using the lathe and my Cole chuck. I glued on a chuck block, but just couldn’t get it to square up, so I squared everything up in place using the disc sanding plate I made, then glued on another chuck block. This was finally square enough to turn, so away we went! It turned pretty easy, and I’m happy with how the feature ring came out. Then I used a vac chuck to turn off the chuck block.
I cut an opening vertically down the front for the mug handle, which was a bit of a trick to not damage the bottom plate but keep machine-straight lines. After that, I drilled and chiseled out a space on the back/bottom for the power cord. Then I sized and drilled holes around the rim for pencils and a couple sharpies. And since I lose my little 6” rule regularly, I carved in a little slot for one of those as well. Some laser work to decorate it up and finished with some Odie’s oil. I used a couple dabs of silicon to hold the warming plate in place and control the cord after it was all said and done…but evidently I completely failed to take the standard ‘end of project glamour shots’!! Dumbass…


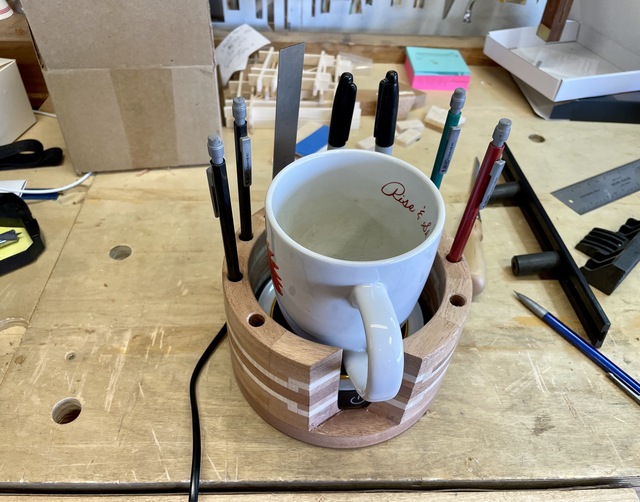
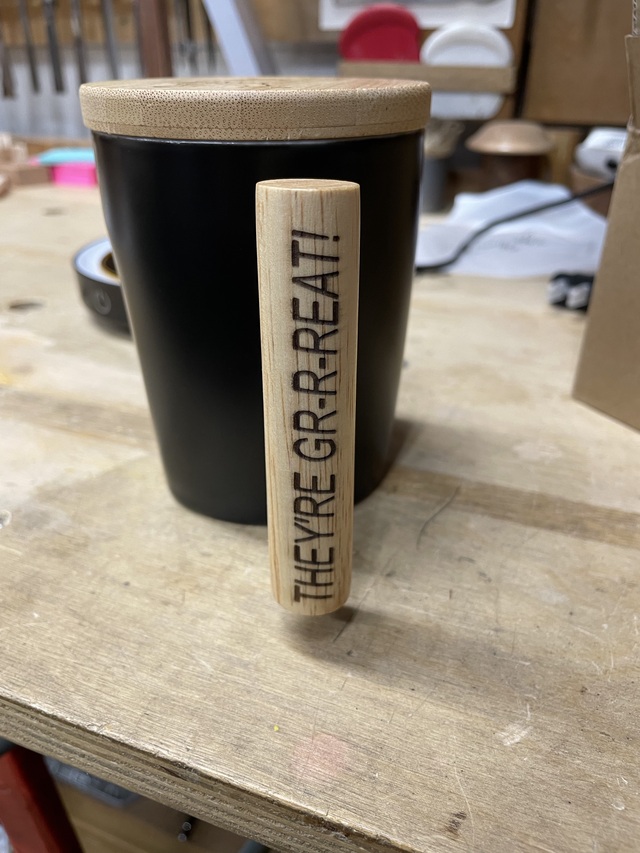
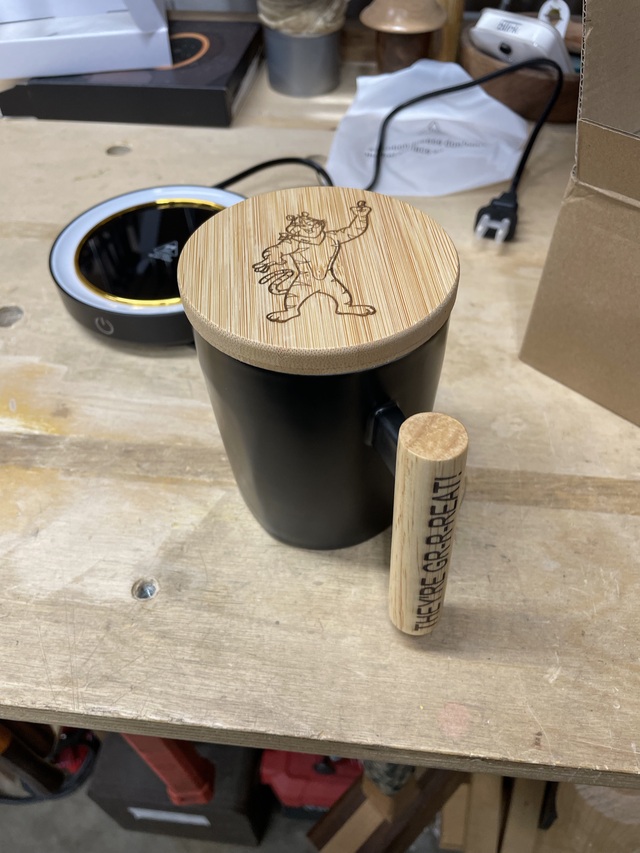
I was feeling pretty good about it, but an issue with mug warmers is they really need a flat bottomed mug to work well. I wasn’t sure Tony would have one, so I found one I kinda liked and lasered it up a little for him. The mug warmer has a light ring on it that comes on when it’s active, so it’s easy to tell when it’s on…the only pics I have of that were during fit up, but I’ll post them anyway.
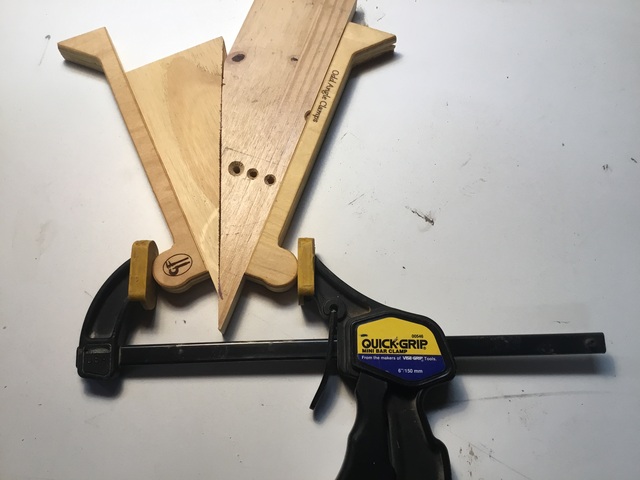
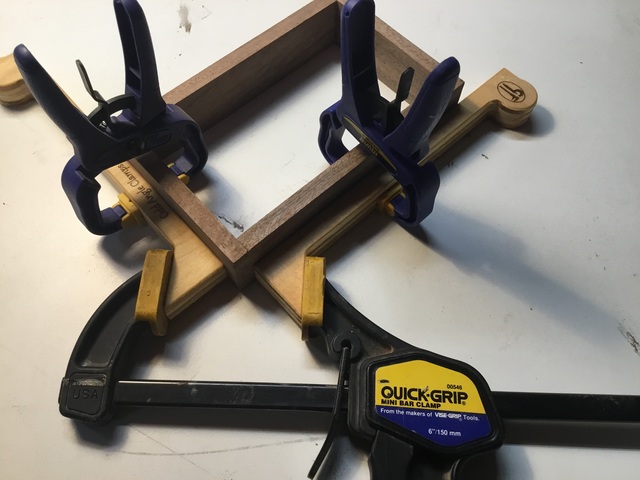
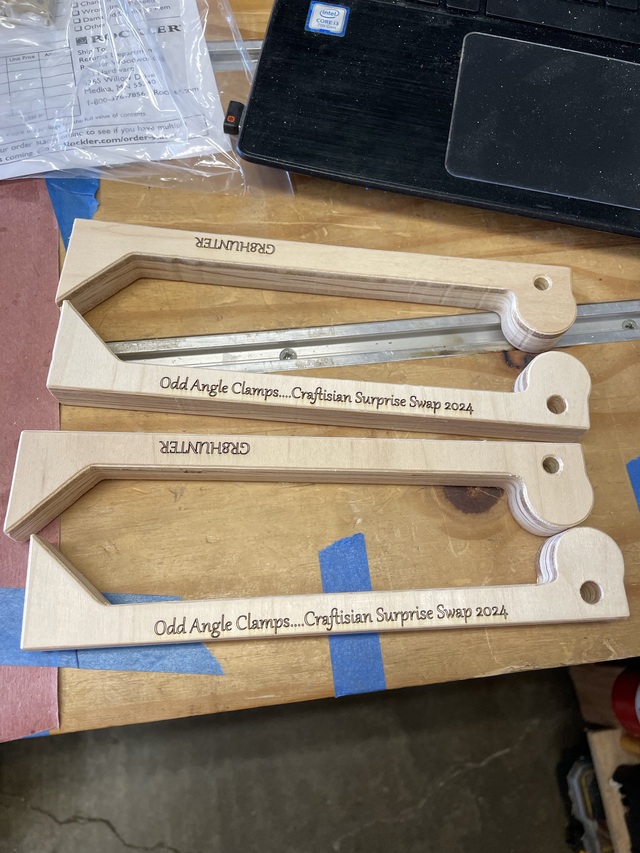
I was thinking about what to do as a bonus item as I was working on an unrelated project…one with weird miter angles. That glue up was a pain, than I remembered I’d seen a Shaper Origin file for an ‘odd angle clamp block’. I figured I’d give it a shot. They’re simple, just cut from scrap ply, but the concept is cool. It’s easier to show than to explain it all but, basically, the odd angle clamp blocks give an in-line purchase point for the clamp to bite on, regardless of the angle of the miter. The round sides are for infinite angles, the triangular sides are cut at 45° which allows for 90° corners. Anchoring the blocks to the side of the pieces to be glued keeps them from slipping. I decorated up the set I made for Tony, and made myself a set as well! Simply finished with BLO.
In retrospect, a thin strip of adhesive sandpaper might be a good idea to increase ‘gription’ on the inside of the block…
Anyway, I had a good time making some items I wouldn’t normally make, and hopefully Tony enjoys them!
Ryan/// ~sigh~ I blew up another bowl. Moke told me "I made the inside bigger than the outside".
21 Comments


BD8 job and writeup R'Gi!... though BD8 just doesn't have the same 🔔as GR8!
I appreciate authors that put a proportionate effort into presentation as effort into the project... (even though I hate reading)... and with a picture worth 1,000 words, it took me a long time to read.
Good to see that I'm not the only 123 bunny... and... even I have to admit 25.450.876.2 just doesn't roll off the tongue the same.
The sanding disc on the tail is a novel (non) spin on use.
Finally, thank you, thank you on those clamping aids... I've had insomnia for the past 3 days racking my brain of how the hell they operate a clamp.
If your first cut is too short... Take the second cut from the longer end... LBD

Nice work, Ryan!
May you have the day you deserve!

Great idea!

i love it all and its good ideas love getting items i can use everyday GR8 JOB 😍😎👍
*TONY ** Reinholds* ALWAYS REMEMBER TO HAVE FUN

nice work all around ryan. love all the pic's showing the process.
working with my hands is a joy,it gives me a sense of fulfillment,somthing so many seek and so few find.-SAM MALOOF.

A great gift, well executed!
I appreciate the comments fellas. It seems like I remember to take in-progress pics on some projects, and not so much on others. And I can’t believe I forgot to take the finish glamour shots on this one! What a dummy…
Ryan/// ~sigh~ I blew up another bowl. Moke told me "I made the inside bigger than the outside".

There are so many features in this project! Excellent swap item!

Some fine work and design efforts Ryan, really like the pattern you built in.
The holder has pure utility as you explained for the initial idea. I'd still need a few of those bank style pen chains however to prevent loss, but that's just the way I roll 🤠
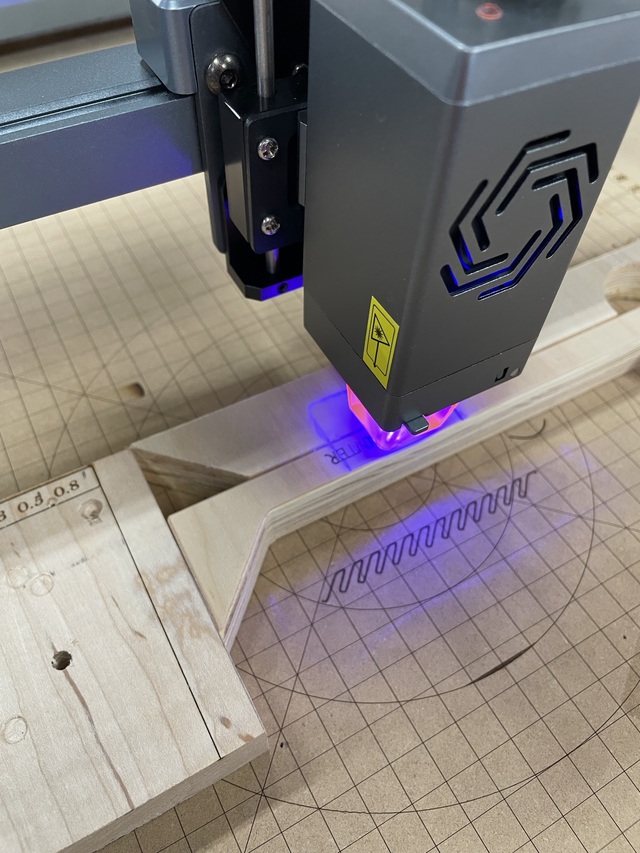
Where did you get that z-axis mount for the laser module and how do you like it? I'm getting annoyed with the factory unit as it will rock slightly as I raise or lower, never quite sure it is going back to the same alignment after moving up/down. A threaded rod like that sure looks like a better method!
The holder has pure utility as you explained for the initial idea. I'd still need a few of those bank style pen chains however to prevent loss, but that's just the way I roll 🤠
Where did you get that z-axis mount for the laser module and how do you like it? I'm getting annoyed with the factory unit as it will rock slightly as I raise or lower, never quite sure it is going back to the same alignment after moving up/down. A threaded rod like that sure looks like a better method!
Impressive work all around.
Splint, I’ve gone through a couple iterations on the z-axis adjuster, including a 3D printed model. In the end, this one is direct from Ortur. It’s aluminum so it’s very rigid, which is really just a requirement. It’s more expensive than the plastic models, but the increase in resolution is obvious when in use.
Ryan/// ~sigh~ I blew up another bowl. Moke told me "I made the inside bigger than the outside".
Thanks Ryan,
Just ordered one. Pricey, but they nail you with discount codes so not too bad.
I see that the 20W module is now spec'd with a square spot vs. the rectangle. Not a big deal but makes it easier when trying to get that last 0.001" of fit.
Just ordered one. Pricey, but they nail you with discount codes so not too bad.
I see that the 20W module is now spec'd with a square spot vs. the rectangle. Not a big deal but makes it easier when trying to get that last 0.001" of fit.

Just never Sease to amaze me. fantastic project and such a great work and idea. I am blown away!

You come up with the greatest ideas Ryan.
"Duck and Bob would be out doin some farming with funny hats on." chrisstef

Thanks. I try to be creative.
Ryan/// ~sigh~ I blew up another bowl. Moke told me "I made the inside bigger than the outside".

Nice Ryan, cool look on that segmented turn - might have to try those clamp blocks, they look handy.
I didn't know mug warmers were a thing, how are we not using these for hide glue?
I didn't know mug warmers were a thing, how are we not using these for hide glue?

Hot Coffee, you mean thats doable in the shop? Under a rock I have been.
I agree your swaps are as witty, as well prepared, nice ideas, and great work, adding the laser bits just cements the personalization.
Win win. I think you will see a growth in coffee warmers, and those clampy helpers are going to get copied a lot. Nice work.
I agree your swaps are as witty, as well prepared, nice ideas, and great work, adding the laser bits just cements the personalization.
Win win. I think you will see a growth in coffee warmers, and those clampy helpers are going to get copied a lot. Nice work.
This is the mug warmer I used, in case anyone is interested in one. Evidently the price just went up, but it’s still not bad. You do need a flat bottom mug though, not one with a ridge. The ridge acts as a standoff and the heat never gets to the mug. You can buy mugs specially meant for it, but you t have one lying around already. 👍🏼 ☕️
Ryan/// ~sigh~ I blew up another bowl. Moke told me "I made the inside bigger than the outside".

Realy cool details. Made with so many small parts ....looks pretty nice.
...woodicted
More from RyanGi