These are actually simple projects to construct, wood working is almost only using a router template to cut out the shape, then sanding plus a finish.
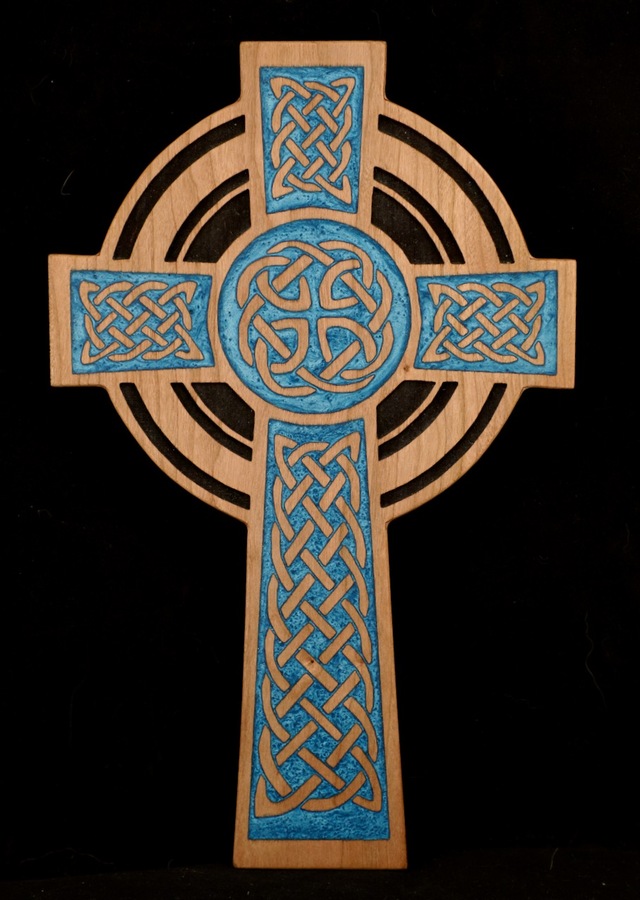
Crosses are 10" tall, some pale walnut and cherry (that will get a nice darker color as the light puts the color back in).
I'm always fascinated with Celtic knots, neat design and very decorative. Hard to believe they are this artistic and can play basketball at a professional level 🤠
So this was another experiment. First one (walnut with copper) had issues, second is what I was hoping for.
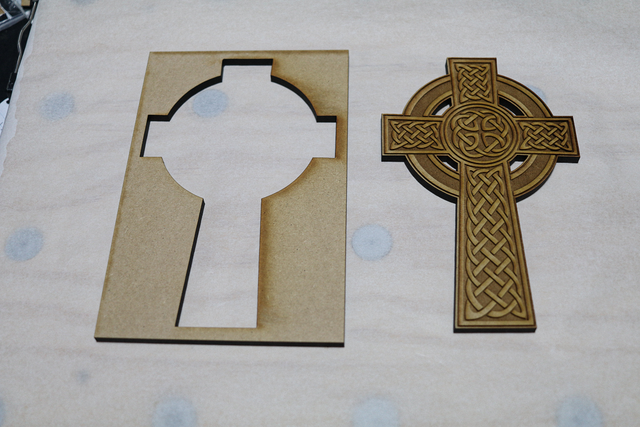
Cross #1
Searched online for an image and did a screen grab. Some chair time spend getting the image resolution up and breaking it into various parts for the laser.
Went well enough. I then cut out some thin plywood to make a template using just the cross outline. I find it easier to cut some thin rigid material since to cuts cleaner and faster. I'll then use this part as a router template on some 1/4" masonite to create a working template. Pilot bearing router bits always have a small gap between the bearing and the cutter. 1/4" gives me enough meat in the template so I can be sure the bearing will still ride on the template edge while the cutter will fully cut the wood thickness.
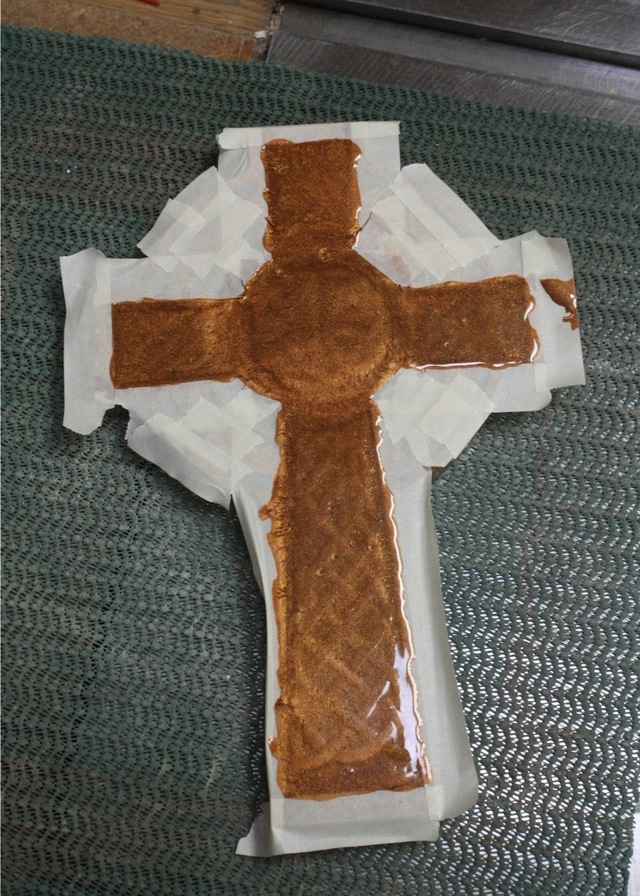
First step was to cut out the shape in the walnut, this is where I started to mess things up a bit.
The laser was set to mark this outline onto a piece of paper taped to the bed of the laser for alignment. Mark made, I could place the cross body in agreement with the layered outline. I got close, but slightly off center. The rest of the etching went fine.
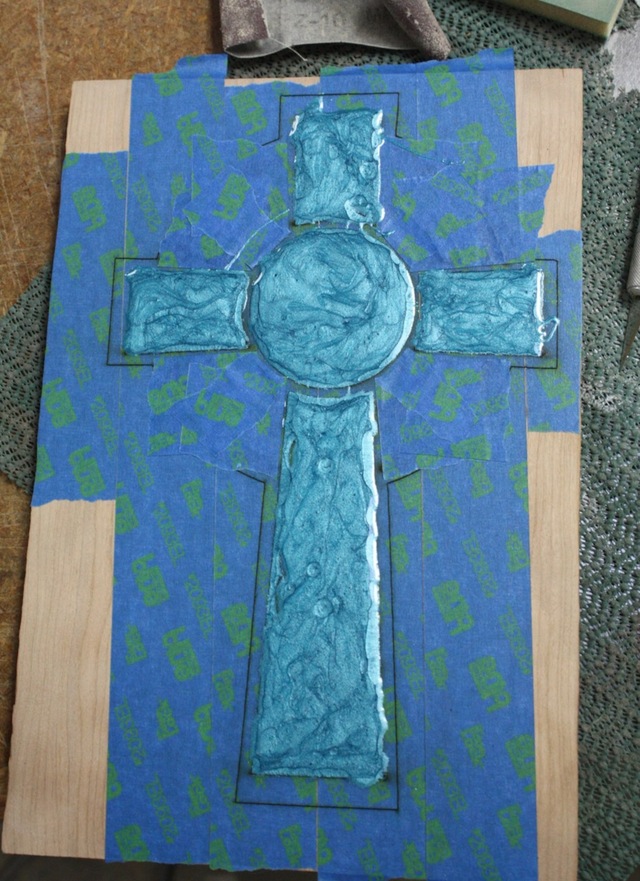
I only wanted to fill the elements with the knots, so I taped off the rest and filled the center sections will a mix of epoxy and copper mica. A bit of an overfill to make sure I'd have no pits and gives the small surface bubbles somewhere to go.
A pass through the drum sander with a 36 grit belt to get rid of most of the excess. Final passes with 180, then a stepping through the grits with the ROS, up to 320 to get the fill smooth and translucent.
Came out with a neato bronze look, really cool EXCEPT there was some leakage under the tape.
I tried some black nail polish (nice small brush) to cover it up. Worked well, but the paint was shiny compared to the burnt etching.
Was hoping that the finish (satin poly) would hide the paints gloss, but that didn't work out so well
Oh well! You can see the pattern is slightly shifted to the right.
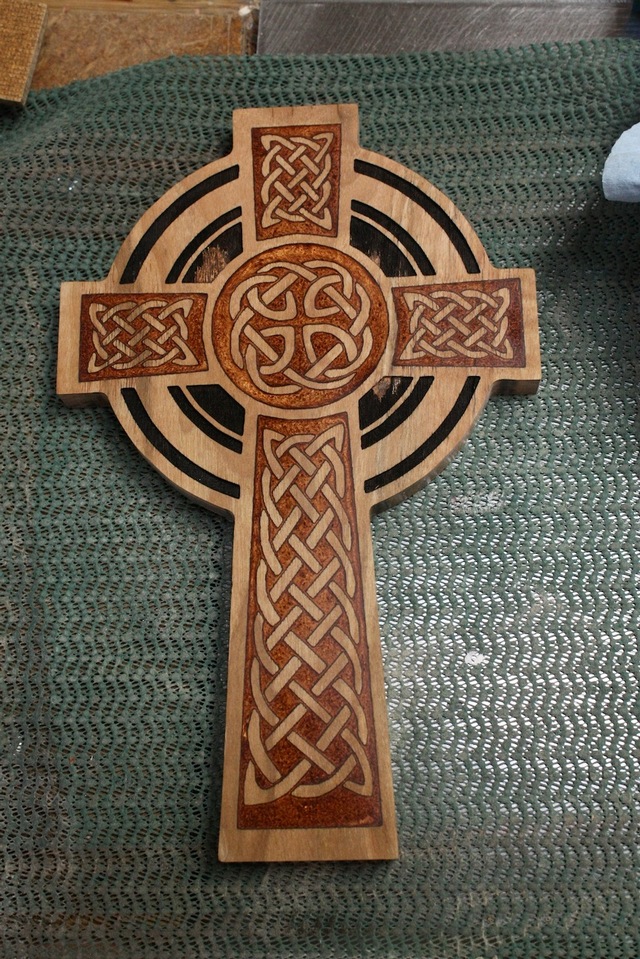
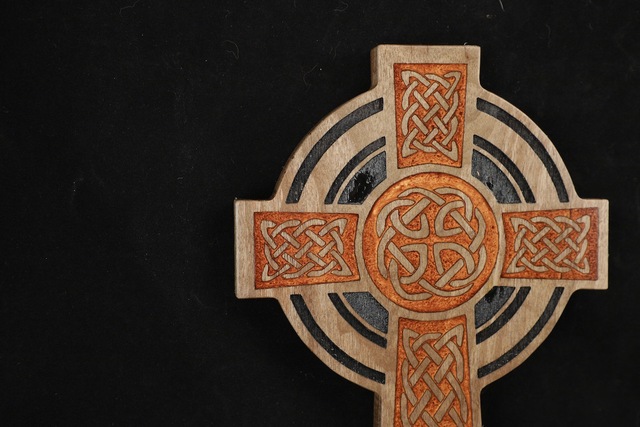
Cross #2
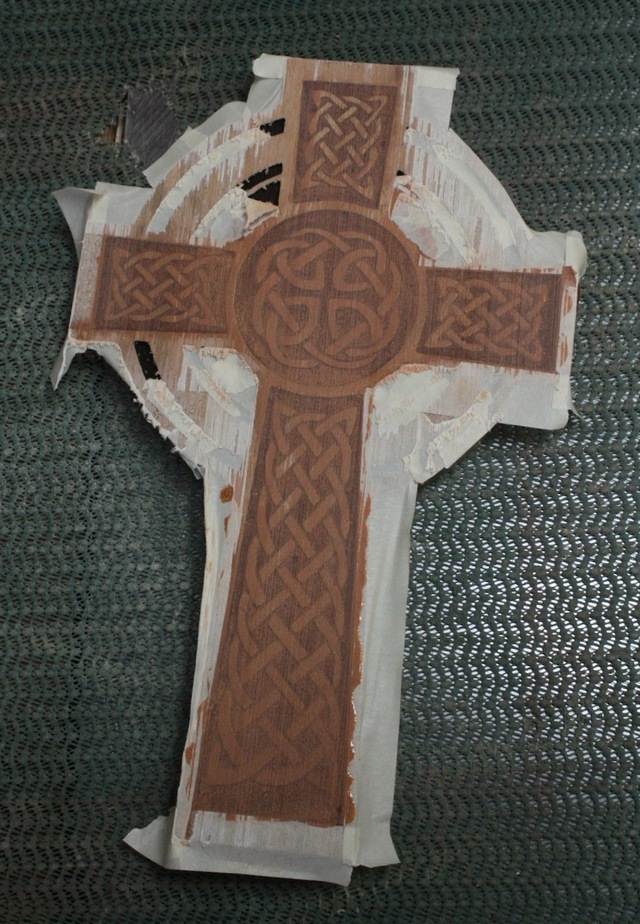
Much better! Placed painters tape over the board (cherry) and made sure it was well adhered, then had the laser etch out the pattern and to a low power burn of the outline to mark the wood though the tape.
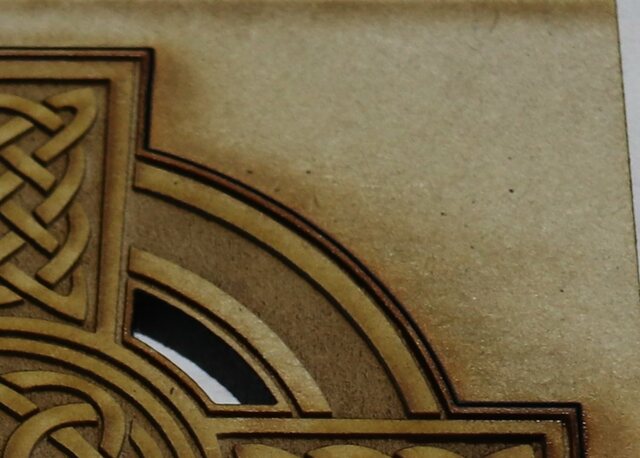
Here you can see the fill (epoxy/blue mica) and where I taped over the areas to keep clean. A more careful pour also kept the epoxy in place. You can see areas where the outline tracing is peaking out (black line)
Same deal with the drum sander to remove the excess epoxy and get the crisp edges. With the outline traced onto the board, I was able to easily align the template for cutting on the bandsaw and then routing.
For next time:
Leave it to LBD to find a higher resolution picture which would make the whole process easier!
I also like the unfilled look, but alas I've got to push things a bit to make them "special/unique"
Siavash, I don't consider myself religious, but I am fascinated with Celtic symbols and patterns. Of course they are too complex for my get-it-done attitude and doing hand carving would make me miserable. Lasers are a great tool to create, easily, many of these shapes and designs so I like to create replicas or just incorporate the pattern into my projects. Plenty of Hispanic Catholics in my area who readily buy these and if they like it, I will satisfy their wants 🤠
I'd rather make items that sell than just sit around. Makes more room for me to make more items!
Nice work! I've only made one Celtic style item, a pierced carving for my wife. Way too much time at the scroll saw! Plus, she's never worn it. 🤔If I were at a point for wanting a CNC mill, I'd do these, too. But too many other things obtrude on my time.
Like you, I like these Celtic Knots and while I have no idea where I'll use them, I have decided to take up the gauntlet between casks of vino.
Sorry Splinter (bless you), when it comes to setup, fine tuning of the laser and experimentation,, you leave me in Antartica, however, when it comes to graphics hope I may offer some suggestions from my novice hacking experience.
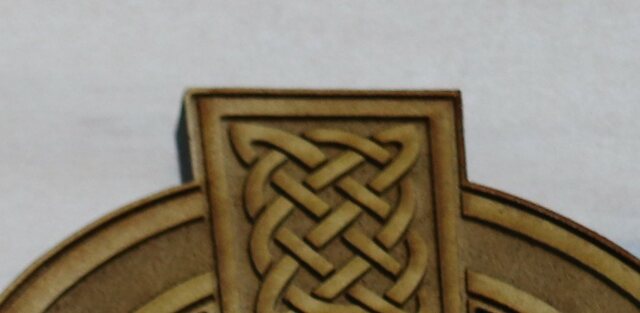
I believe the cross has a circle in it, so there should be some minor cutouts to accentuate the circle, Yeah, yeah... bloody MDF... hell, here in downtown Churchill the residents are just learning to plant seeds and harvesting trees is a long way away.
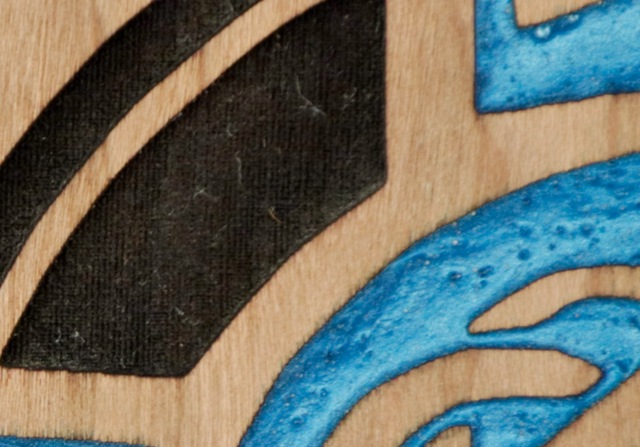
I have found that when backfilling you cannot engrave to the edge, else you don't have a surface to build up the edge backfill against. I always create a .5-1.0mm artificial circumference to give a supporting wall, the outside line is the cut kerf.
Will try to emulate this project, if only to convert users to Timbermate and bolster my shares value. My BAC is suggesting I don't imbibe and indulge in a sabatical, our limit is 0.05... don't believe a Canon... the reading lies.... errr, I've just had a tad sample of a full glass. As all bad smell, I don't go away.
If your first cut is too short... Take the second cut from the longer end... LBD
Earl commented about 2 hours ago new Seeing the kind of work that can be done with a laser, CNC, or the Shaper Origin makes me wonder if I should ditch the router table. RyanGi commented 18 minutes ago new I’ve got a laser and a Shaper and I still use my router table all the time. Different tools for different tasks.
Routers spell clamps in another language... you just can't have enough!
If your first cut is too short... Take the second cut from the longer end... LBD
I really wanted to cut these cross shapes out long before I even thought about a laser, but of course there is no way to get nice sharp interior corners with the router table. Though about doing the basic shape first, then attacking arcs, but the reward/effort just isn't there. 🤔
Even with my laser, can't cut thick stuff like you can. It is a perfect solution to the sharp corner dilemma. SO, given that I try to figure out a way to at least make it look like the arcs are cut.
Infill borders, ayup! Took the original image and shrank the knot fields just to beef that border up.
makes me wonder if I should ditch the router table.
No way Jose!
Maybe a good CO2 laser could take some of the load and a Shaper is just a router with a built in expert pilot. The combo would get close to replacing a table, but still not quite. Table is also a lot cheaper! 🤠