Any justification of a generous 5* review (if rated), would be based on me only playing with the Plate, toying with the setup of the WorkStation, executing a simple process with the BenchPilot and watching quite a few videos presented by the Shaper team.
The main purpose of the review is to raise awareness of the product(s) and not necessarily to educate.
Boys and Girls,
I’m planning/have started a series of reviews about the Shaper Origin and associated accoutrements:-
According to the Shaper WEB site, the following is their overview of the upgrade kit,
· Over 3X larger than the Shelf Assembly, included with Workstation | Dimensions: 410 × 280 mm
· Stays flat under load with the included Adjustable Support Leg | Height range: 740–1140 mm
· Fine tune adjustment to ensure coplanar surface with Workstation
· Does not include Shaper Workstation
After buying my BenchPilot (BP), the manual detailed its use in combination with the Workstation (WS).
Personally the original WS came with a poopsie 298.5mm x 115mm x 18mm shelf top,
which I considered an insult to the concept of this Shaper setup and far too small for use with the BP.
There was a reasonable introductory shekel discount for the Workstation upgrade kit (WUK),
which made me consider this after market purchase.
While the increase of the shelf top size of 410mm x 280mm x 18mm was not necessarily the sweetener, but an additional shelf body for batching work appealed to me, as did the adjustable shelf support stand.
Due to the larger shelf top (increase of 340%),
the support needed to be stabilised and the adjustable support stand
seemed ideal, opposed to a shop built or alternative brand purchased one.
The shelf comes with a bracket to “pin attach” the stand,
The stand itself came with a push button action for quick initial positioning,
and is backed up by a micro adjustment thread knob,
for fine adjustment of the protruding shelf’s end.
The foot on the stand is fitted on a swivel
that permitted self leveling,
Once the stand is attached and roughly moved into place, the shelf is levelled with the WS’s surface using the WS’s support bar (or any other straight edge),
and the micro adjustment on the stand.
Personally this is a nice to have, but an unnecessary extravagance. That’s why the 3* as there is no reason why you can’t make a larger shelf top and fabricate or buy some sort of a cheaper support… unless you’re lazy like me.
One more Shaper review to come… thanks for watching.
Don’t be crafty Craftisians,... SHARE your craft!
If your first cut is too short... Take the second cut from the longer end... LBD
Thanks for reviewing this. I would buy this in a heartbeat because I made a larger top and have first hand experience with the gradual and imperceptible dip that comes over time with routing further away from the tape field.
Which is to say that when you move the router out toward the edge furthest away from the workstation, there is an issue of sagging by a few thousandths of an inch. That itself does not seem like it would affect much, but it does in the fact that the cut becomes less than perfectly perpendicular.
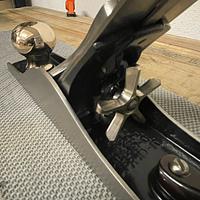
I realized this when I examined results on hand planes that I make with the Shaper Origin on the Workstation atop an extended shelf. I was curious if the Shaper Origin could be coaxed into producing a ready surface for the sole of the plane right off the cut. If I rotated the parts of the plane to place the sole closest to the workstation instead of furthest, I get better results with less post-processing to get that work-ready sole of each plane body.
DT, I plan to post a project on my customisation of the upgrade kit, but as a fast track, all you need is some sort of lifting mechanism that could be shop made using a button nut, which will satisfy both the fast positioning and micro adjustment in the one tool, (pictures are a round and hex nut, and are 15.875mm but the one supplied in the kit is 12.7mm)... and this leveling process,
If your first cut is too short... Take the second cut from the longer end... LBD