Share your craft projects
Make new craft buddies
Ask craft questions
Blog your craft journey
Craftisian Blogs
view blog series
I can't really tell if the ends of the stretchers on the original chair had shoulders around the tenons or not. I decided that I would use shoulde...
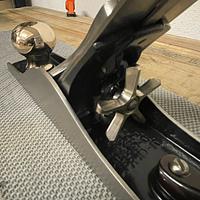
Side rabbet plane. They had this priced at $48
[IMG_8810.jpeg]
I talked them down to $20. Just because I love a bargain.
EDIT: at $48, I don’t k...
While I had been thinking about how to make the arms from the time I had started scheming to build this chair, by the time I got to this point, I s...
In this project, I'll be building a pair of chairs modeled after Hans Wegner's, "Bukkestolen", which he designed for Johannes Hansen in 1959.
Weg...
With the leg finger joints complete, I could trim the legs to their final shape. This could have been done more quickly on the table saw with a p...
The red tools neither venture into the salvage yard all that often nor last long when they do. The folks at the salvage yard are also unaware of th...
I think that the row of finger joints between the arm and leg is a perfect example of honest design. The joint provides incredible strength to the...
For $8 — not a typo
Minty in the box
I am shook
It had no price. That usually means $1-$5
Greg, the guy ringing me up took one look at it, look...
Imperial, 1/1000th of an inch accuracy
For $8 — actually marked as $8. No haggling, just a pristine minty dial caliper falling in my lap. Had one ...
I have "migrated" to Craftisian from LumberJocks. I was pretty disappointed when the new LJ forum design appeared (or shall we call it "monetizing"...
My flagpole mount on the side of the house saw it's best days many years ago. Finally I stepped up and did something. I'll see if I did the right t...
These are stone carver’s rifflers, but unlike any that I have ever seen. Instead of having stitched teeth they have cut recesses along an edge. The...


