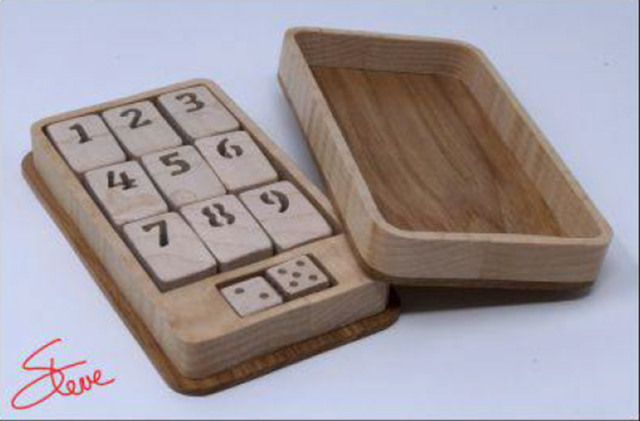
This is my bonus project to the BeerBq swap for HokieKen. I wanted to come up with a game. I was looking through my plans and saw this one from Steve Goode.
I liked the idea of the small size. I had built a version of this game before but it was a lot larger. However there were a few things I wanted to change.
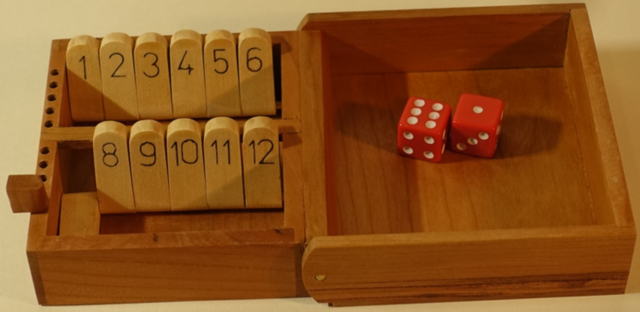
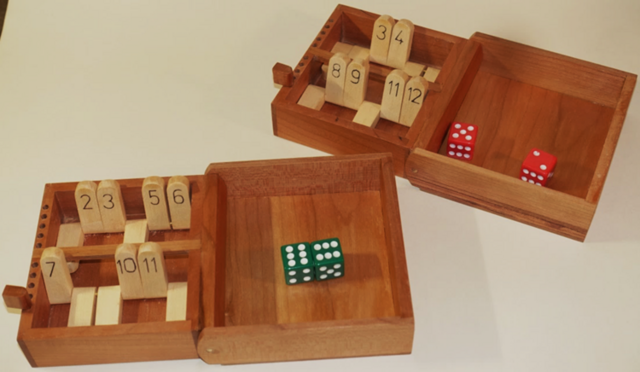
There were only 9 numbers instead of 12
Too many parts to lose – especially if one is out on the patio keeping an eye on the grill
I had no interest in scroll sawing numbers
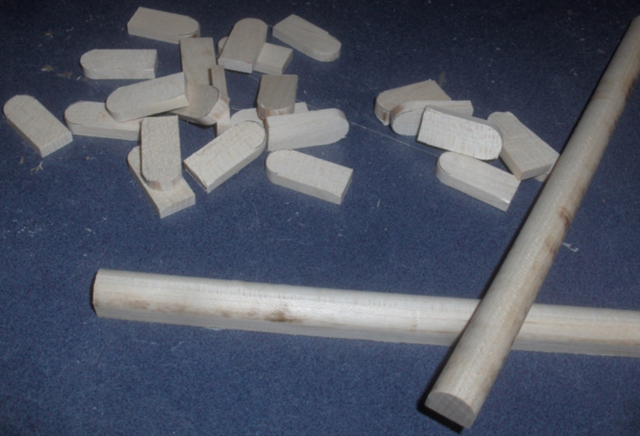
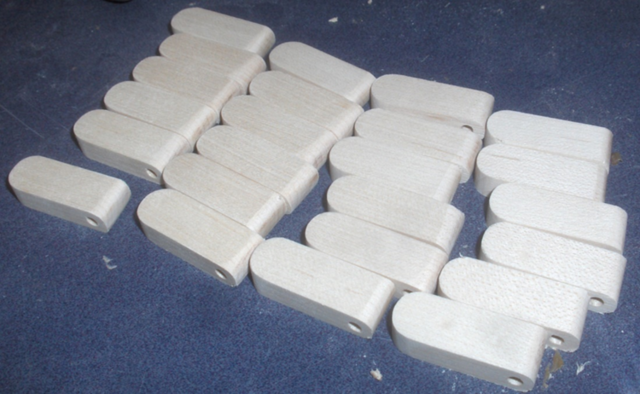
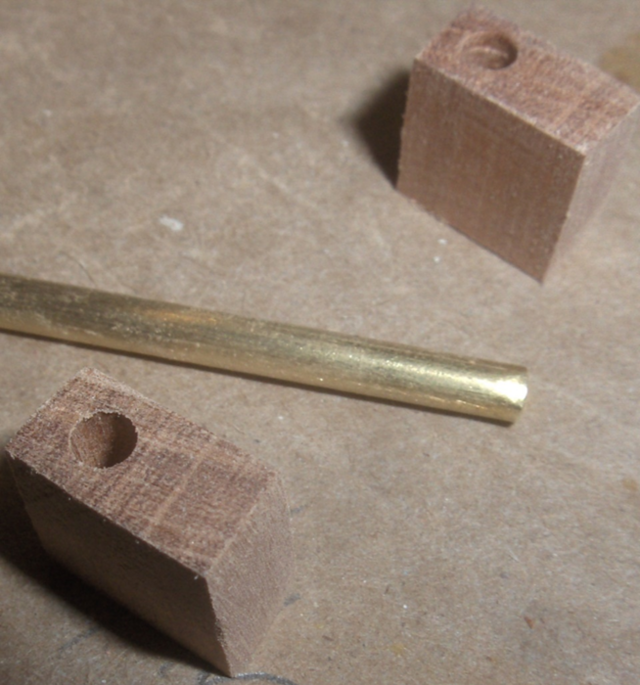
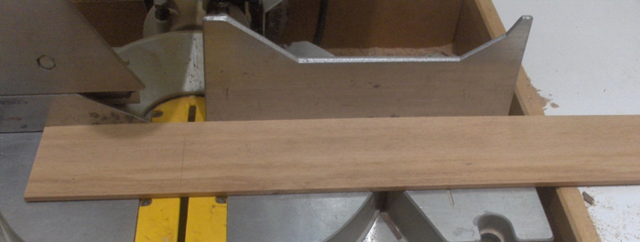
This project kept punishing me for thinking it would be quick and easy to come up with my own design. I came up with my first version that addressed all my dislikes and started the build. I wanted to build 2 games since it can be fun to compare scores. I had a ½” wide strip of maple left over from my cutting board project. I cut that into 24 number tabs and rounded the tops.
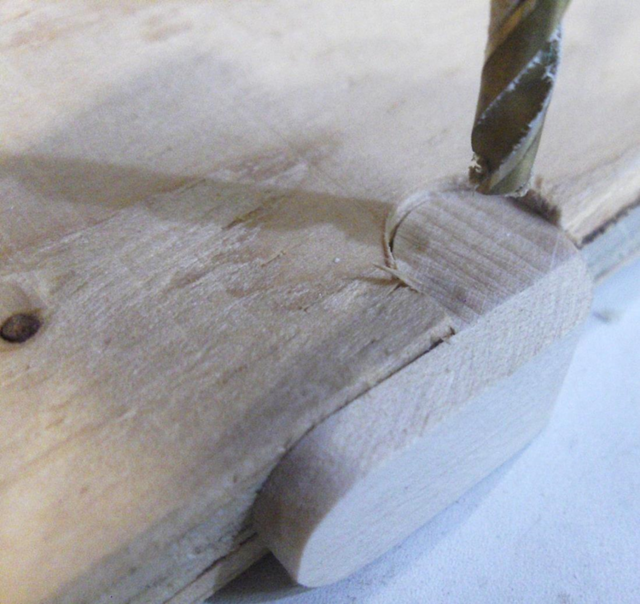
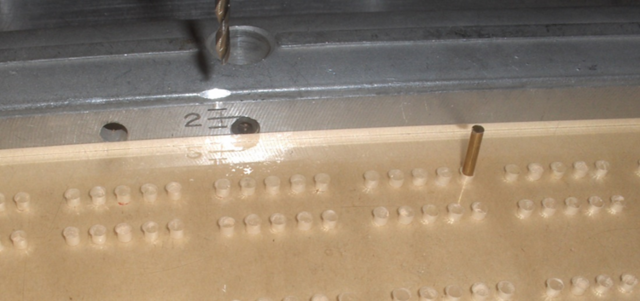
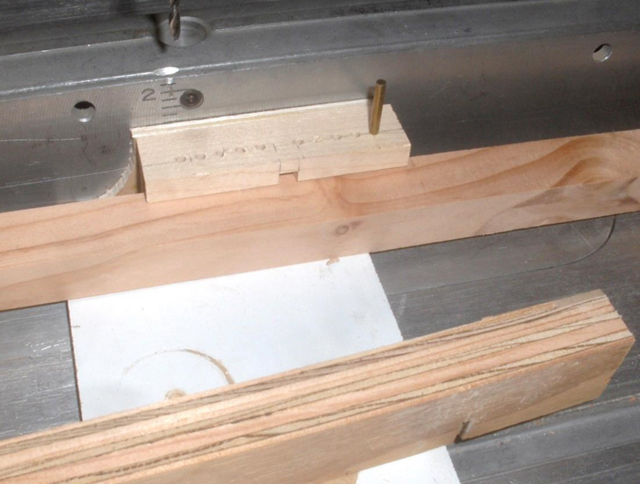
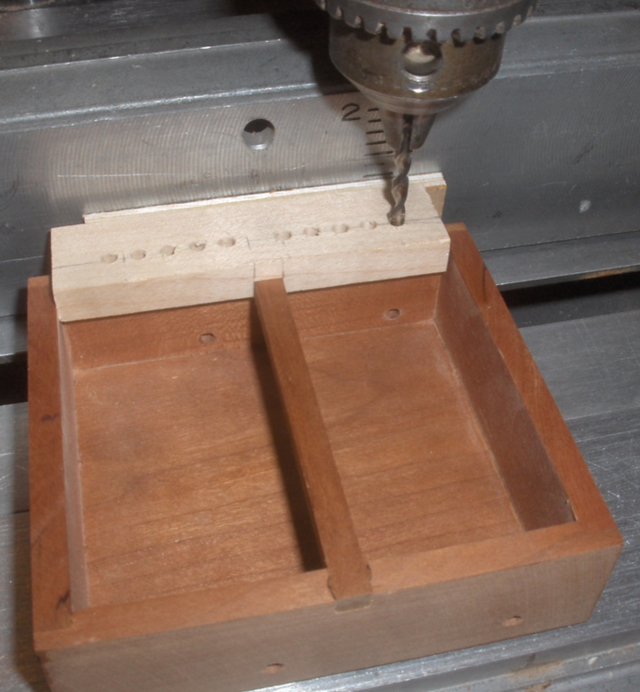
These were glued onto the axle bars and cut apart. I then drilled holes for the axle rod.
That gave me the 24 numbers I needed for 2 sets of 12.
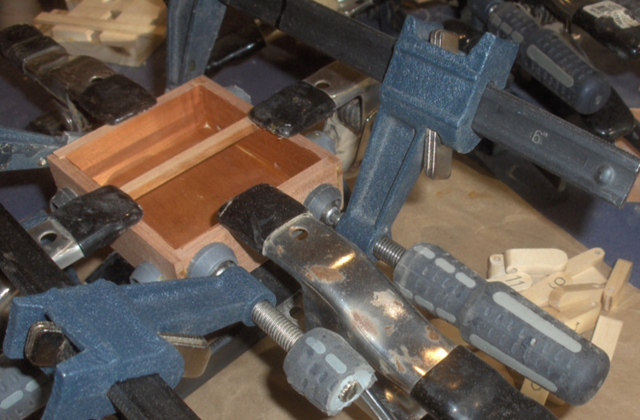
I then forged ahead on the 2 boxes. I was moving along so smoothly I forgot to take pictures. Once I was far enough along I slid the number tabs and held the box together by hand. I tipped the box back to flip the numbers up and
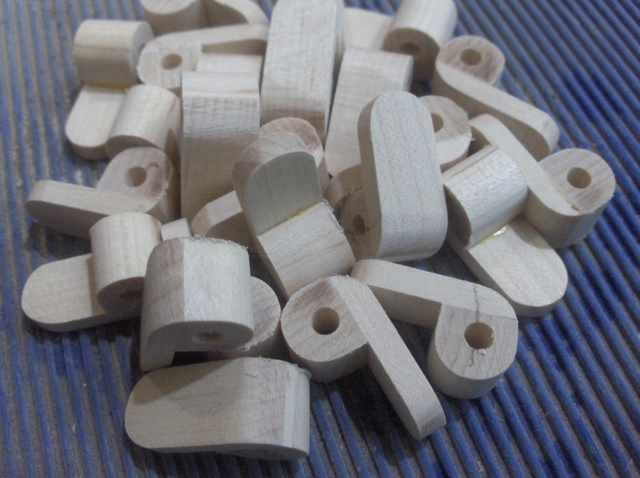
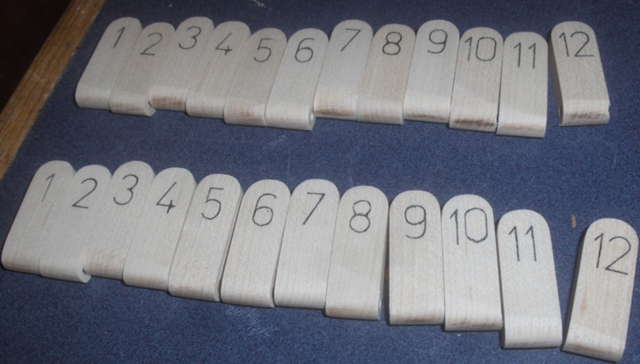
All the numbers fell down. Agressively. I had to nearly stand the box on its back to get the numbers to stay up. Punishment #1. I didn’t even think about gravity. The pivot point is so far behind the number face that there is NO way this was EVER going to work. I scrapped everything and did a redesign. I put the pivot points inside the number tab and made sure they could tilt back far enough. I cut a new set of number tabs and drilled the axle holes.
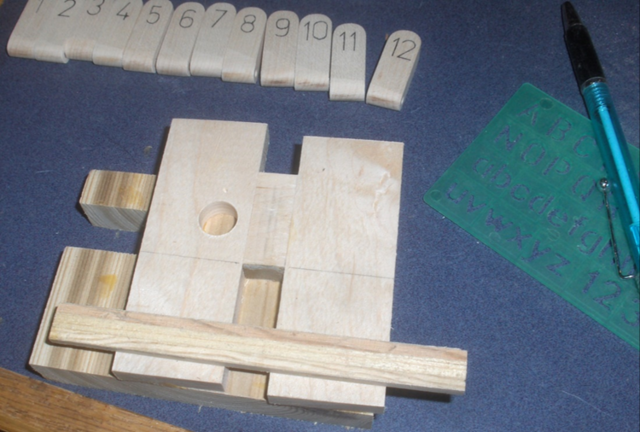
I made up a little jig so I could line up a lettering template. That made quick work of getting all the numbers in place.
Again I dove into making the boxes and got to the point where I could test out my new and improved design. Failure. Again. Punishment #2. I was too optimistic about how little clearance I could get away with and the number tabs bound up against the floor of the box.
I looked at my number tabs and I found that the holes were not quite centered. That gave me a thick side and a thin side. I noticed that the thin side ones seemed to work okay. So I sanded the numbers off and checked the hole locations and put the numbers on the thick side. Again I tested the performance. Failure. Again. Punishment #3. I needed to put the numbers on the thin side not the thick side! Clearly I’m moving too fast.
So, I sanded the number tabs (again) and put the numbers on the correct side. My lettering jig got a lot of use.
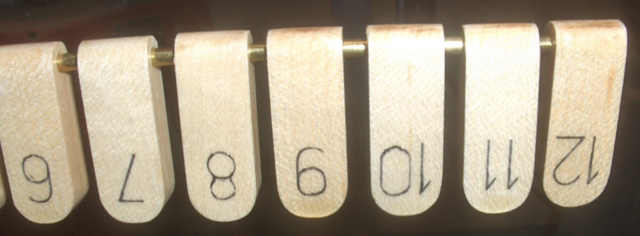
So, for the 4th time I tested out the operation of the number tabs. Failure. Again. Punishment #4. One the previous test the thicker parts bowed the axle and gave enough clearance for the thinner ones to operate smoothly. Now that they were all (mostly) uniform they still bound up.
I sanded the wood from around the axle pins to gain clearance. That still took up to 3 tries before they worked. Punishment #5. Variations in hole locations in the number tabs, hole location in the box sides, floor location, and axle rod straightness all came into play.
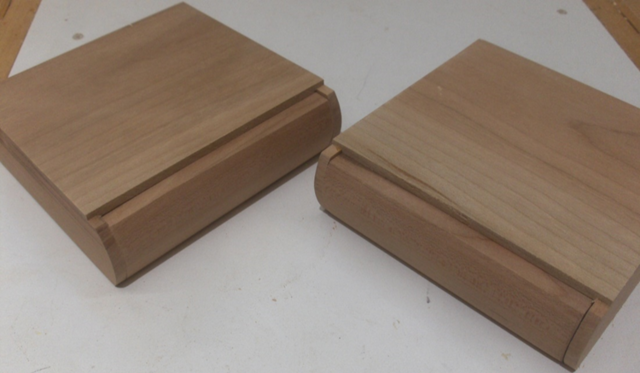
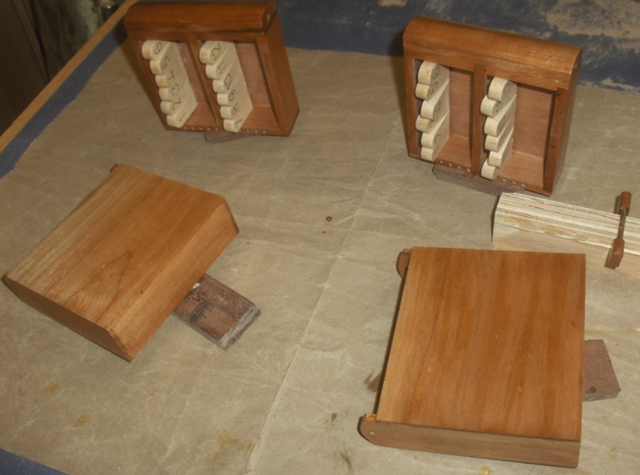
Finally I was able to put finish on the boxes and numbers.
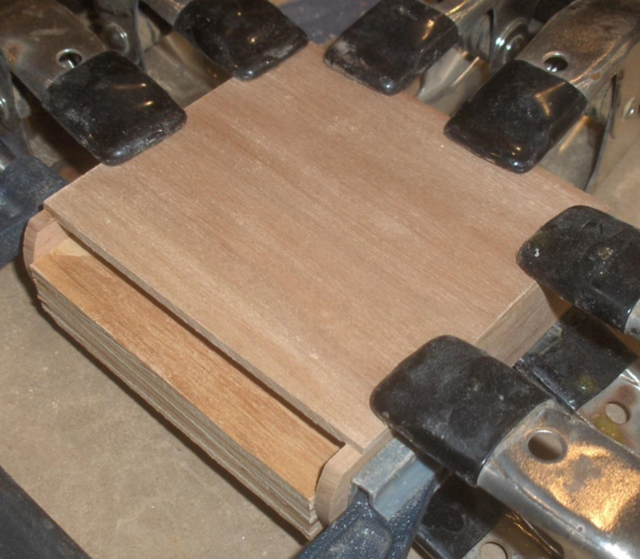
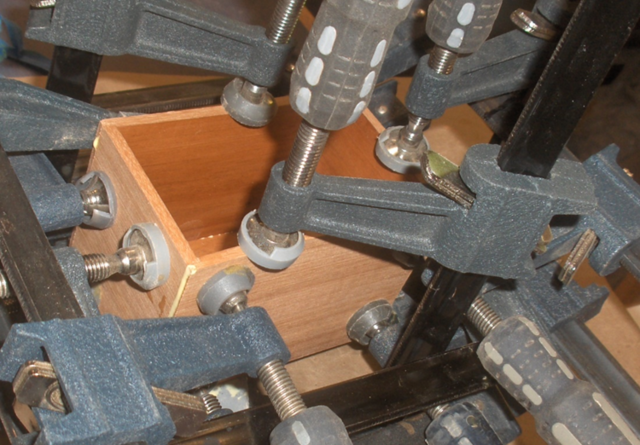
After pre-finshing the interior faces I glued the boxes up.
At this point I decided that my bonus project needed a bonus feature. I wanted to add a marker to keep track of the # of wins. I made a jig using my cribbage board template (which I have never used).
Here is what was under the template.
I could then place this jig on the box and put a set of holes along one wall.
Since this was voluntary it wasn’t a punishment but the project did get bigger. I then made pins to fit in the scoring holes.
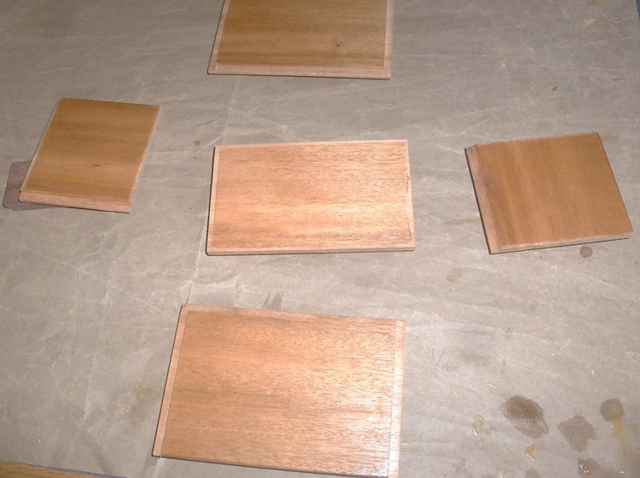
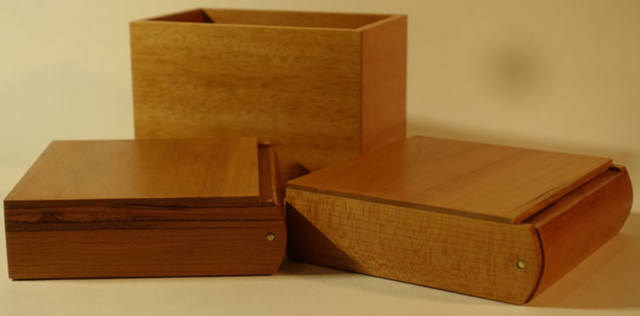
I then moved on to the lids for the boxes.
The test fit looked good.
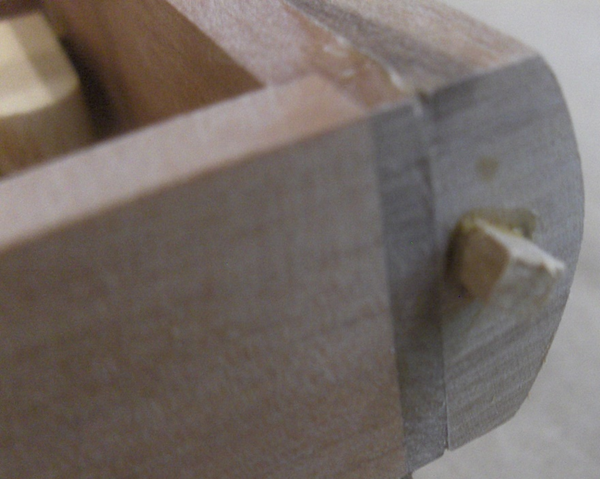
I then set up to locate the pivot pins. After double and triple checking my math I located the holes and drilled them. The lid wouldn’t open. At all. Punishment #6. I patched the holes and came up with the correct location.
And drilled the new holes.
Finally I could put the last coats of finish on .
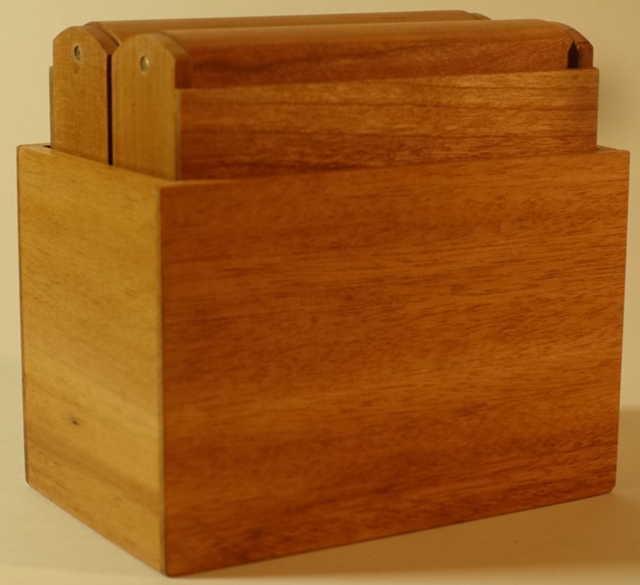
But --- after playing around with them a bit I realized they really needed a caddy (added effort #2). I found a scrap of wood the right size.
I pre-finished the interior surfaces.
Then I glued the caddies together.
And finally after 6 resets and 2 extra features this thing was done.
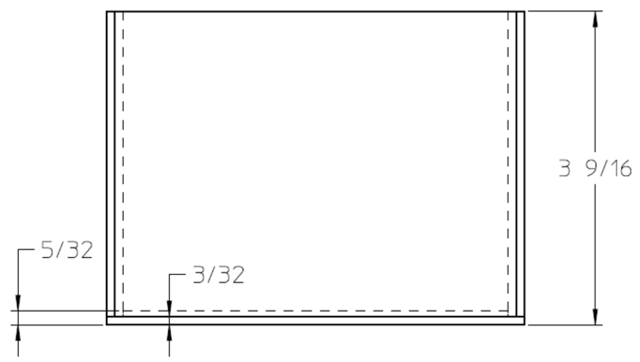
Plans Here are some dimensioned views for anyone that wants to build one. There are probably some missing dimensions, but there should be enough for someone to figure it out. The dimensions are in inches.
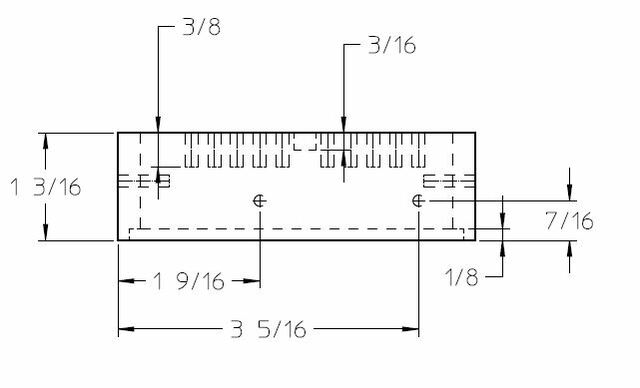
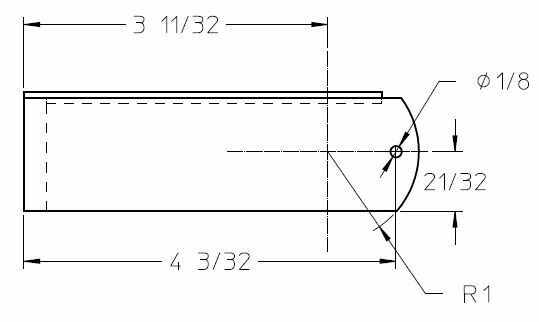
Box Top View
Front View
Side View
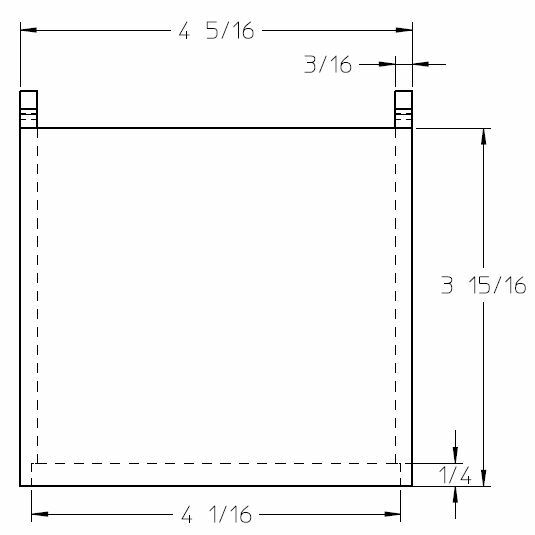
Lid Top View
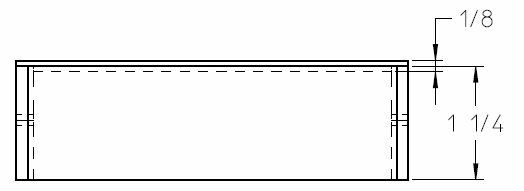
Front View
Side View
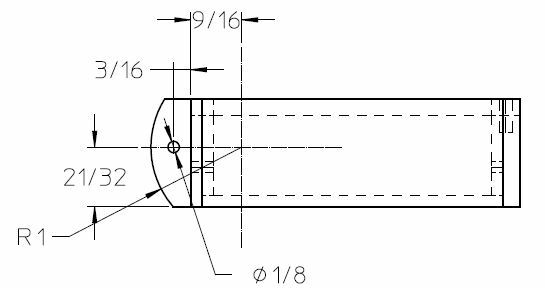
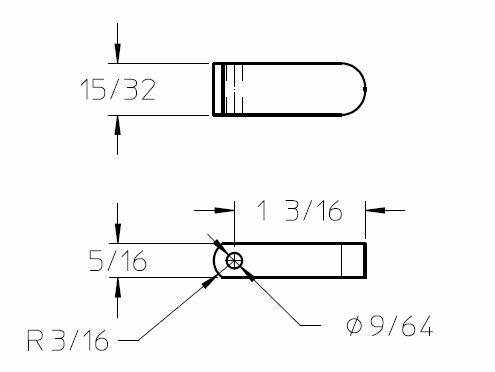
Number Paddle
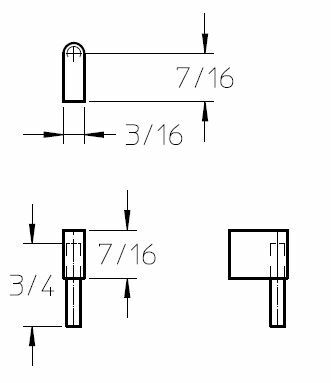
Marker
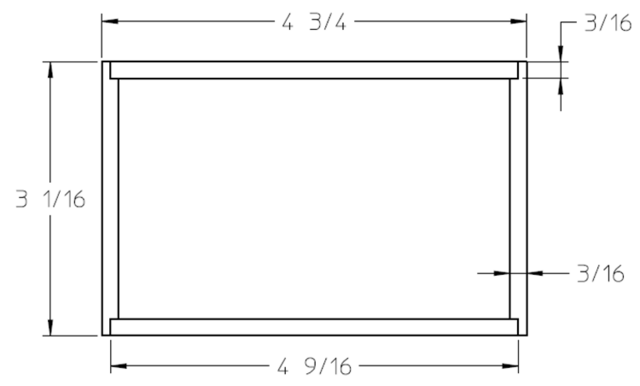
Caddy
By the time you get two games made you might need to adjust these dimensions. Here is what I came up with.
Top View
Front View
Update: As long as I’m including plans I might as well include the cut list (dimensions are in inches)
WOW Steve I had no idea this was such an effort! I'm even more thankful that it made its way to me now!!! I probably would have said "bonus my ass" and threw a pin in the box after Punishment #1. I sure am glad you didn't. I'm about to leave work now and my plan is to go plant my butt on the patio with a Washington beer and roll some dice by myself 😁😎
After some close examination, I can see the woes this project presented you! Especially packing them into such a small package. But in the end you nailed it 😎 I played for about 45 minutes last night and it worked flawlessly. A flip of the wrist stands all the numbers up and the tiles are big enough to easily flip them back down individually without accidentally catching the adjacent ones. At first I thought that having the lid open to the side like it does was a little unusual but after playing, it's perfect that way. I can roll the dice in the lid and flip the tiles with my right hand while holding the game with my left. If the lid opened to the front, I think it would be more inclined to want to flop closed while held with one hand. (Think of holding a book). Just goes to show that thinking through a design thoroughly can be time consuming and create extra work but in the end, the attention to detail shows through in the final product!
If I had one suggestion, it might be to line the inside of the lid with leather or cork. If you were playing this around other people I could see the noise of the dice getting annoying 😉 That's something I can do if I decide it's necessary though so I won't be returning these for a rework 🤣
Yeah I thought of that as well. The trick with that set is the lid closes tight against the base. You could place two rectangles of cork (or other) that would line up with the two rectangular openings in the base. Another idea would be a piece of felt that gets folded up inside the box when stored and laid out in the lid when playing.
Actually, the more I think about it adding a couple cork rectangles to the inside of the lid seems like a good idea. It would do a good job of deadening the noise and is possible to install.


 - Project by Steve Rasmussen")


")
")
")