


Share your craft projects
Make new craft buddies
Ask craft questions
Blog your craft journey


[07.00 Magnets - Rendering.jpg]
With the spool blocks and tilt stops shaped and sanded, it was time to start thinking about the magnets that woul...

[02.02 Design - Spool and Bobbin Blocks.jpg]
When I last worked on the spool blocks in Part 2: Starting on the Spool Blocks, they had rectangul...

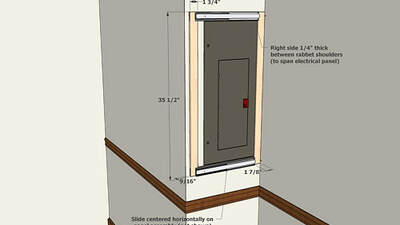
[02.06 Design - Rack Details.jpg]
The rack sides are 1 3/8” wide, and I needed to drill vertically centered 1/4” diameter holes spaced 3” apart in...

[02.02 Design - Spool and Bobbin Blocks.jpg]
After going with my wife to the lumberyard (where she selected Calico Walnut, a lower grade that ha...

[02.00 Design - Overview.jpg]
“Hey Ron, I have something you might want to build for me.” That was my wife speaking, and that’s how this project s...
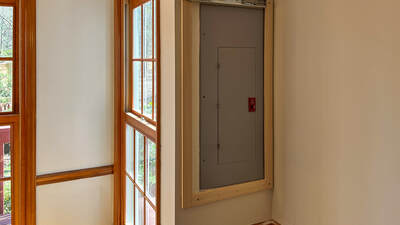
I installed the shelf in my daughter’s house last week. I knew I had measured, and re-measured the wall and electrical panel the last time I was t...
When I “finished” the project two months ago, I noticed that the panel face was very slightly concave. Here, I’ve placed a 36” long straight edge ...
[03.05 Design - Mounting Bracket.jpg]
Theoretically, I could mount the drawer slides directly to the wall above and below the breaker box and attac...
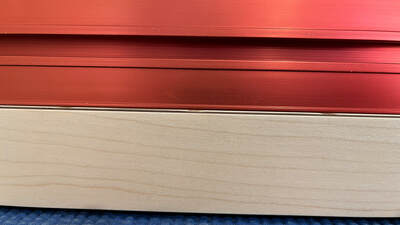
I used General Finishes High Performance Water Based Poly (flat) for the finish. I love this finish for maple. It levels well, dries quickly, doesn...
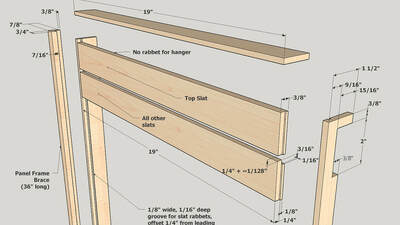
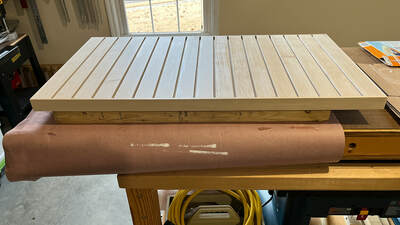
[03.01 Design - Slats and Frame.jpg]
The back panel is sort of a hollow shell around the sliding mechanism. I wanted to keep it low-profile and as ...
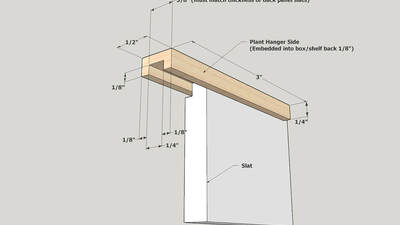
[03.04 Design - Hangers.jpg]
I wanted to use aluminum C-channel for the box/shelf hangers, but I couldn’t find any that was the size I needed, so I...
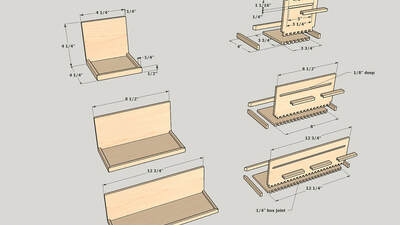
[03.02 Design - Shelves.jpg]
The L-shaped shelves are a bit more complicated than the boxes. Each consists of five parts (not counting the hanger...