shipwright
in almost 12 years
Marquetry Jewellery Box #12: Bump-out Verticals
This is
part 12
in a
17 part
series:
Marquetry Jewellery Box
I left off last time with this photo from “Masterpieces of Marquetry” that I chose to adorn the bump-out verticals where the centre drawers stick out past the side ones.
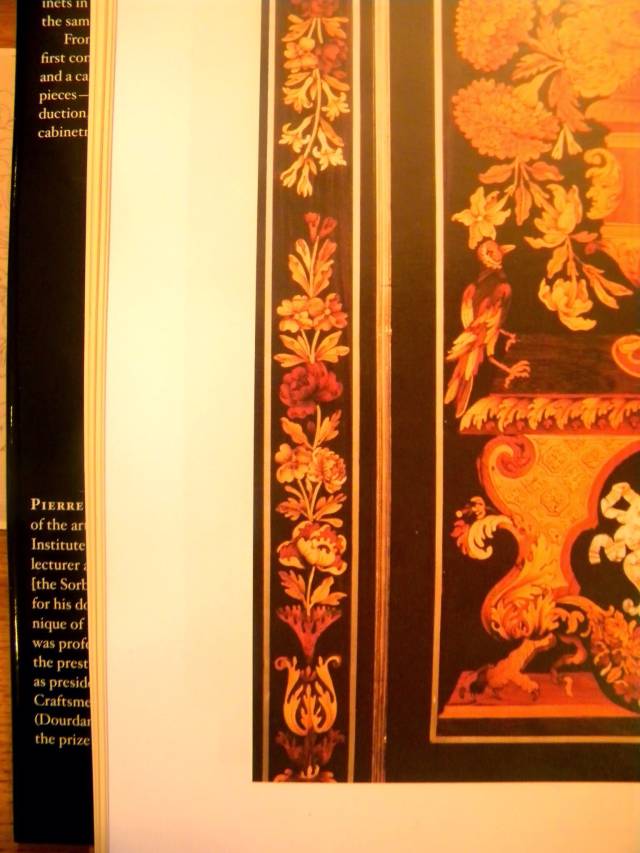
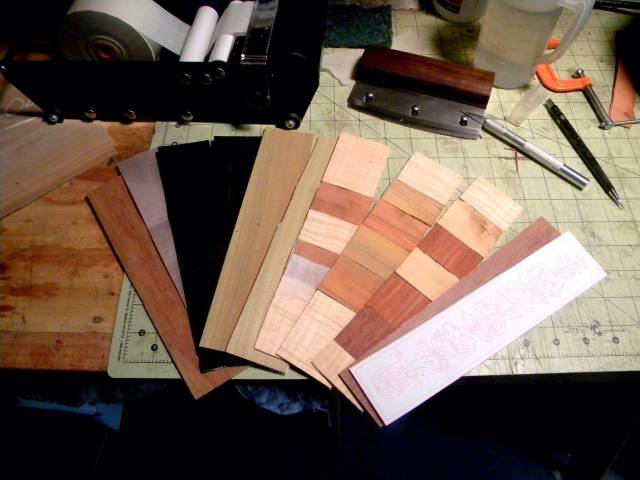
After cutting the side motifs these little strips were easy, almost relaxing marquetry therapy. These are the painting in wood packet layers employing Curly Maple, Espenille, Padauk, Pink Ivory, and Poplar on an Ebony ground.
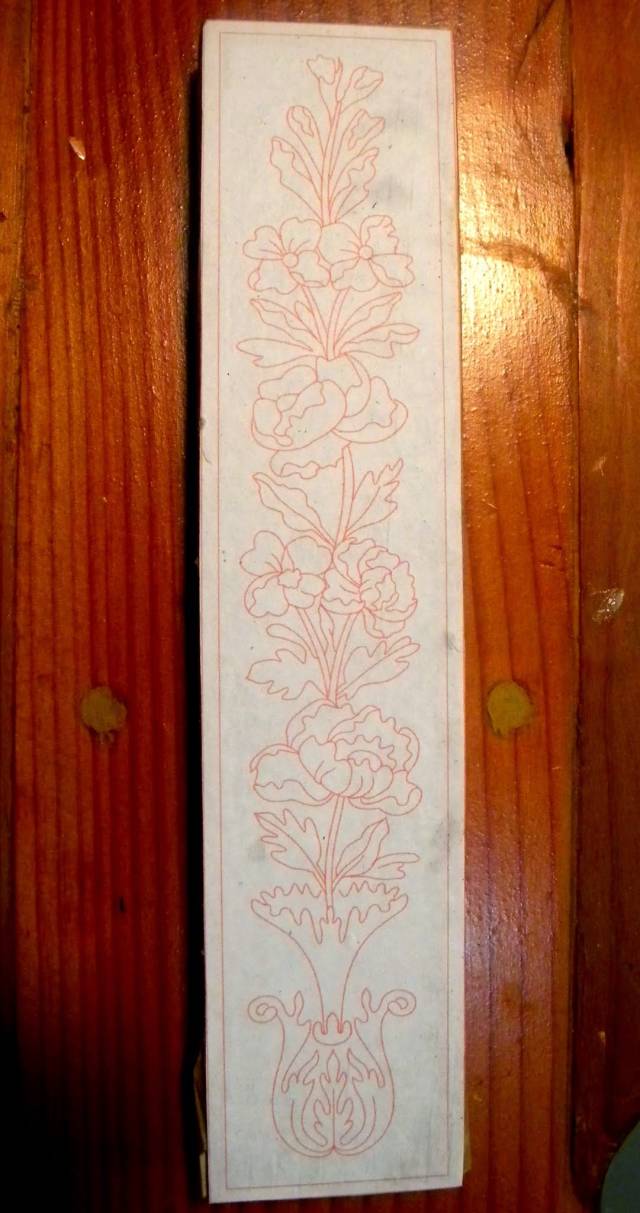
Here is the packet, ready to cut with my Inkscape tracing glued on top.
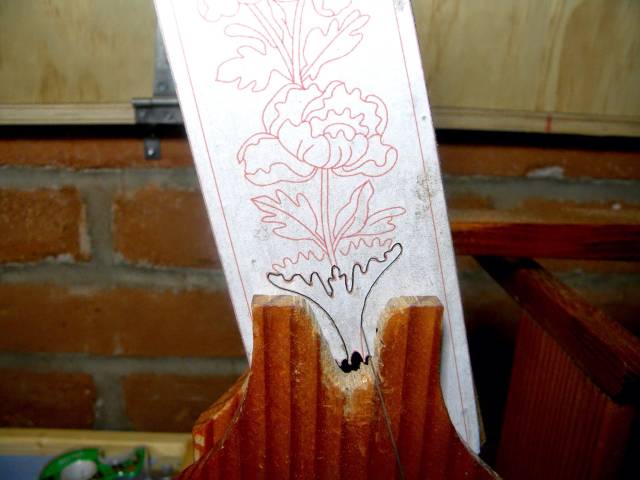
The cut pieces, glue side up, on shelf liner ready for shading.
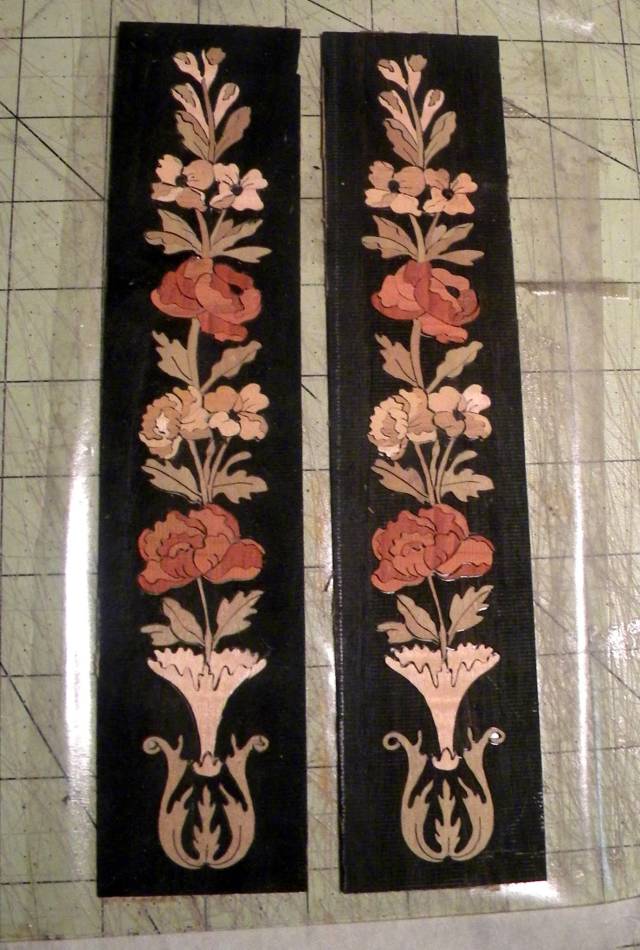
And here they are sand shaded, mounted on kraft paper, and ready for filling and pressing. That will have to wait until the top marquetry is complete.
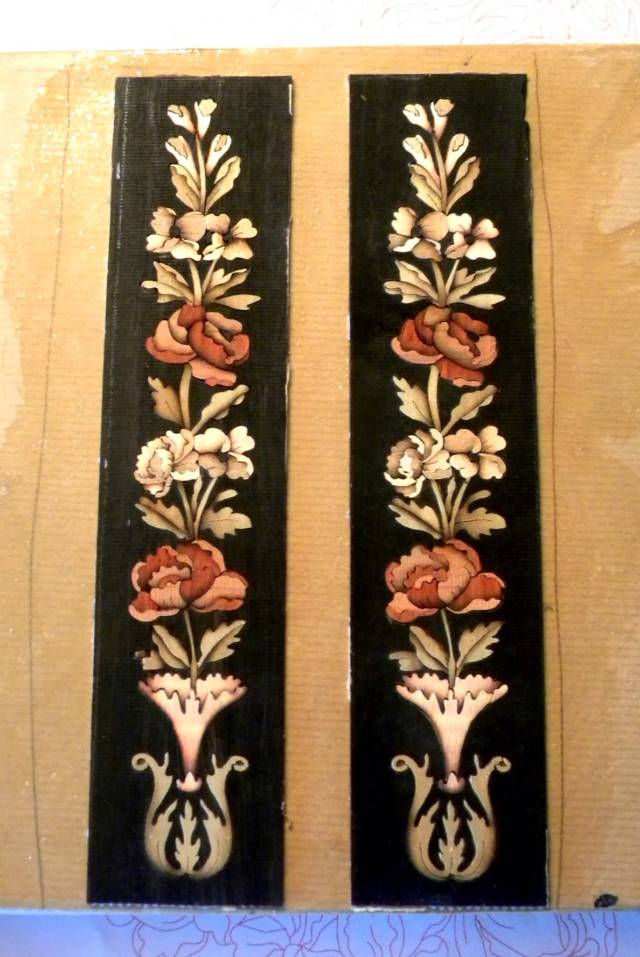
An easy bit of marquetry and a short entry this time. Next up is the top, the most challenging cut I have attempted. It will also be cut in PIW style but I have a little twist on the old methods that I’ll show in the next segment.
Thanks for looking in.
Paul
The early bird gets the worm but its the second mouse that gets the cheese.
19 Comments
Admiring your work Paul and dreaming at the same time.
Do you take out one piece at the time from the shelf line for shading or a bunch together?
Abbas, Castro Valley, CA
I mostly do them one at a time with a spoon . Most do several at a time in the pan. I prefer to see my progress a piece at a time and by taking very hot sand from the bottom of the pan I can shade quite quickly or by taking sand from higher up I can be more subtle.
The early bird gets the worm but its the second mouse that gets the cheese.
Shading is an art in itself.
Thanks!
Abbas, Castro Valley, CA
Very beautiful strips.
CHRIS, Charlottetown PEI Canada. Anytime you can repurpose, reuse, or recycle, everyone wins!
Beautiful work Paul. It looks great without the sand shading, but with the shading it takes on a whole new dimension, and you are already extremely good at it. With all the very fine work you’ve done on so many marquetry projects to date, I hope you have thought to insure them as I’m sure they must be worth quite a lot.
Mike, an American living in Norway
I agree with mike above- I thought why shade and then saw the difference. Very nice work!!!
How thick are these packets? How thick and how many can you do at a time? What is the hardest part of cutting them? Man I am really thinking of learning this. I have done very little lamination, mostly with plastic type materials for table tops. You make what must have taken years to perfect look like child’s play. You sir are a great artist!
CHRIS, Charlottetown PEI Canada. Anytime you can repurpose, reuse, or recycle, everyone wins!
Packets vary in thickness depending on the thickness of the veneers and number of layers. These had seven layers of 1/16" veneer (two Ebony, two Poplar, and three mixed),a piece of 1/8" plywood on each side and a piece of grease paper. The total thickness would be close to 3/4".
3/4" is about the thickest I have cut although I have cut more layers (thinner veneers).
You can make several identical copies using piece by piece (classic style). The most I have done is the nine on the drawer fronts of this project.
You will get a lot of answers in my cutting styles blog.
The early bird gets the worm but its the second mouse that gets the cheese.
Paul, that’s the second time I run against “grease paper” . The third time it was refer to as lard paper.
I understand it’s for lubricating the blade as it cuts.
Some people use wax paper, the one we use to cover food.
Is the lard paper simply a paper covered with a thin layer of lard? The grocery store have a pack of lard. can I simply melt some and brush it on a paper just like when they make pastries?
Which one do you use?
Abbas, Castro Valley, CA
I use grease paper that I make by applying hot bacon grease to one half of a sheet of newsprint with a paint brush and then folding the dry side over on top. The grease stays pretty much inside so it doesn’t get on the veneer. It lubricates better than wax paper, has no waxes, and gives me an excuse to eat bacon. The process is described in Ramond’s “Marquetry”.
The early bird gets the worm but its the second mouse that gets the cheese.
Paul,
It’s amazing how you can turn something so difficult into — as Thorreain said — child’s play. This still looks extremely complicated to us.
One question: is there a particular reason why these panels aren’t mirror image to each other?
L/W
“Those who would give up essential Liberty, to purchase a little temporary Safety, deserve neither Liberty nor Safety.” Benjamin Franklin
No, it’s just that as you will never be able to see both at once, there was no need. It isn’t cast in stone at this point and I may still flip one. What do you think?
The early bird gets the worm but its the second mouse that gets the cheese.
Thanks Paul.
I guess I already have the ingredients:)
Abbas, Castro Valley, CA
Paul,
My husband pointed out the same thing: that both are not visible at the same time so there’s no need for them to be mirror image. It is quite possibly something that no one would ever notice once it is finished. But, I would probably still make them mirror image if I had all that talent to make such masterpieces as you have! Perhaps I’m just trying to make you think that I’m not unbalanced! LOL
L/W
“Those who would give up essential Liberty, to purchase a little temporary Safety, deserve neither Liberty nor Safety.” Benjamin Franklin
OK, now you have me thinking.
While I do like to leave things a little off perfect symmetry, just because, I guess I did make the ends mirror images so maybe these should be as well.
……. under consideration……
The early bird gets the worm but its the second mouse that gets the cheese.
My opinion will not add up to a spoon of beans in a cup of bacon fat but here goes…I like things to have symmetry and match. If you have already incorporated symmetry in the piece then stick with that. My 8 pence worth.
CHRIS, Charlottetown PEI Canada. Anytime you can repurpose, reuse, or recycle, everyone wins!
Ok I know my opinion won’t add up to a spoon of beans in a cup of bacon fat but here goes…I like things that are symmetrical. If you already have incorporated symmetry in the piece then stick with the symmetrical sides. Just my 8 pence worth.
CHRIS, Charlottetown PEI Canada. Anytime you can repurpose, reuse, or recycle, everyone wins!
Beautiful work Paul. Still trying to perfect my inlays before I even attempt marquetry.
Anna
Don’t wait Anna. Marquetry is actually easier than inlay.
With your scrollsaw skills it would be a piece of cake.
The early bird gets the worm but its the second mouse that gets the cheese.


