


Share your craft projects
Make new craft buddies
Ask craft questions
Blog your craft journey
Blog Series
Techniques & Tricks
Part 1: Homemade veneer softener
I needed some veneer softener, so I went looking on the Internet and I found this recipe at Highland Woodworking. Perfect, but my local pharmacy do...

Part 2: Punched metal decoration
I’m not certain yet how it’s going to look when done, but I experimented a bit with punched metal this morning.
I printed this photo on a piece of...
Venturi Vacuum for Work Holding and beyond...
Part 3: Bits and bobs...
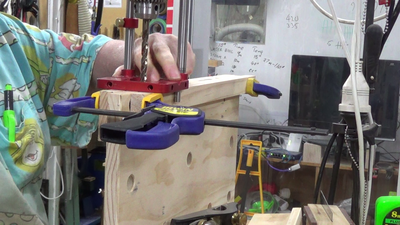
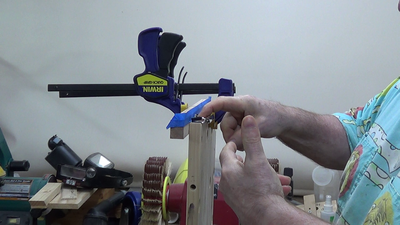
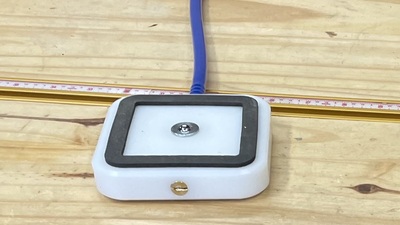
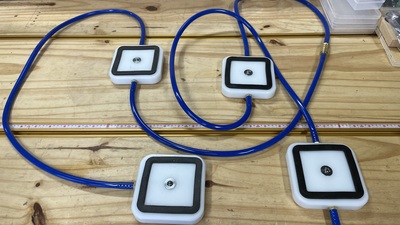
This entry is going to focus on the bits and bobs that turn the venturi pump from a pump into a workholding device. This one rambles a bit, so get ...
Part 4: ...and now for the clamping!
In this installment, I'll be talking about the actual implementation of the vacuum clamp, successes and failures, and what I plan to do next...
As...
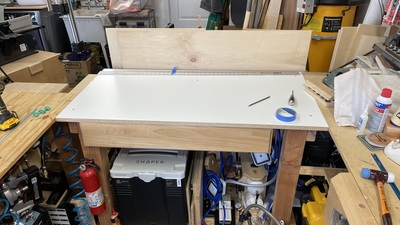
Part 5: P.S. - new benchtop!
Just a short entry, maybe almost just an addendum….
I swapped out the table top on the Auxilary bench for a 2’x4’x3/4” thick chipboard covered wit...
The Workshop Style Guide
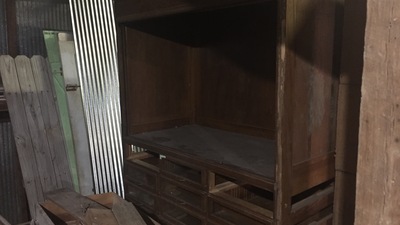
Part 1: Vintage Cabinets
Here we go again… Literally.
It was a dark and stormy night. Well, no, not really stormy. Or even night. But it was dark. And wet. My son was with...
Part 2: Cabinet Installation
The first installment concluded with a bank of three large store cabinets at Dad's shop, with normal moisture content, ready for use 'somewhere.' T...
Stanley 45 Combo Plane Overhaul

Part 5: Just Some Little Bits
First, I'll toss this in here. I should have included it with the other wood pieces in the last entry but I forgot. I kept the original Rosewood pi...

Part 6: The Home Stretch
I had a little bit of cleanup left to do. I put a couple of coats of Tru-Oil on the knob and tote. I also had the cam rest from CL810 that I hadn't...
Part 7: Does It Work?
Well, I guess we know IT works. The plane has been around for over a century. The question was, could I make it work?
I haven't had any time to sp...
The Humble Hand Brace - A Beginner's Guide to Restoring, Buying and Using
Part 6: Part 6 - What to Look for when Buying a Secondhand Brace and more
I thought I'd mix it up a bit in this part of the blog and record a video where I:
• Discuss what to look for when you pick up a secondhand brace a...
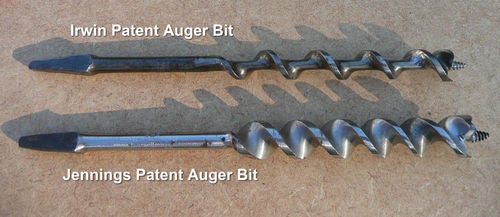
Part 7: Part 7 - Sharpening an Auger Bit
I know I said that sharpening an auger bit would be part 8 of this blog series, but I've taken the liberty of bringing it forward since the 'Using ...
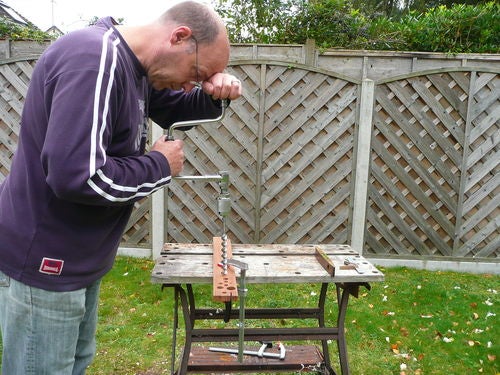
Part 8: Part 8 - Tips and Tricks on Using a Hand Brace
In this episode I wanted to look at using a hand brace and explore some of the so called hints and tips out there to see if they really are useful....
Carving a Welsh Love Spoon
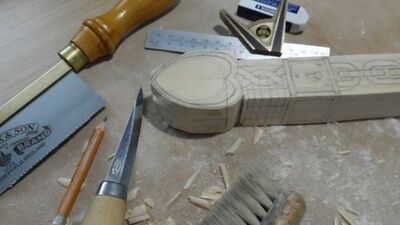
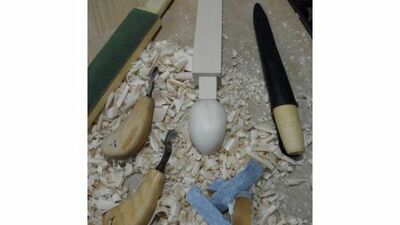
Part 3: The Heart-Shaped Bowl
Now it is time to carve the bowl of the spoon. Since the top surface of the spoon bowl needs to be lowered somewhat and I will lose my drawing of ...
Part 4: Carving the Chain Section
I was going to do the padlock next after roughing out the chain, but once I started on the chain I was enjoying myself so much that I just kept rig...
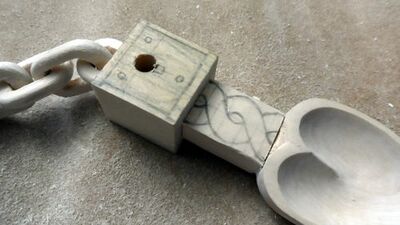
Part 5: The Twisted Stems and Padlock
I decided to tackle the twisted stem section in parallel with the padlock and I kind of jumped between the two as I progressed.
First off, I drill...
The Stanley 444
Part 1: An Overview
An Overview
[Image]
Welcome to Part One of a short blog series that is a hands-on presentation of the Stanley #444 Dovetail Tongue and Groove Pla...
Part 3: Let's Make a Joint!
Under the guise of 'sharp fixes everything,' I went after the cutters with a vengeance after the first couple of blog installments to ensure the an...
Cat Climbing Structure
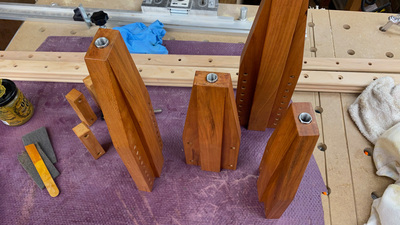
Part 9: Completing the Uprights
With the sanding out of the way and the threaded couplers epoxied into the feet, the only thing left for the upright components was to apply some f...

Part 10: Climbing/Nesting Modules
For the shapes of the climbing modules, I took inspiration from the simple circle-triangle-square shapes that were repeated throughout the 2021 Net...
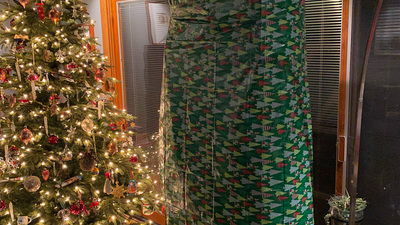
Part 11: How do you gift-wrap a cat tree?
It turns out that two bicycle gift bags will work. Tell me this doesn't look like a giant headless matron in an evening gown. A masterful decepti...
Shipyard Memories

Part 20: The Jig, Patterns, and Hull Glue Up
As these boats are a little larger than the usual stitch and glue hull and because some of the bends are difficult, I chose to make a female jig ...

Part 21: Closing Up the Hull
Time for the trickiest part of this round stern hull, fitting the stern panel.
Here we have carefully clamped the stern piece exactly in place a...

Part 22: Finishing The Build
I'm afraid that the photos are a little scarce from here on but I'll do what I can with what there are.
This photo shows the keel halves ready f...